- Courses
- ItemPath Integration Guide
- Configure a Connection


Configure a Connection
With a plan in mind, you can begin to build out your integration. The first step is saving the information necessary to connect with your ERP inside of ItemPath as a Connection. Connections allow you to store information necessary to connect to an external service (API or database), and use that information to connect to the service for an integration.
Connections and settings
In the previous page, we asked that you identify the authentication requirements and the URL for your ERP. This typically involves:
- Connection Type such as a REST API, GraphQL, MSSQL, or DB2.
- Authentication type and details such as username and password, header keys/values, client keys/secrets etc.
- Information about the connection such as the address (URL), test endpoint, or database name.
The best source of information for what connection type and how to find out this information is the documentation for your ERP system.
Create a new connection
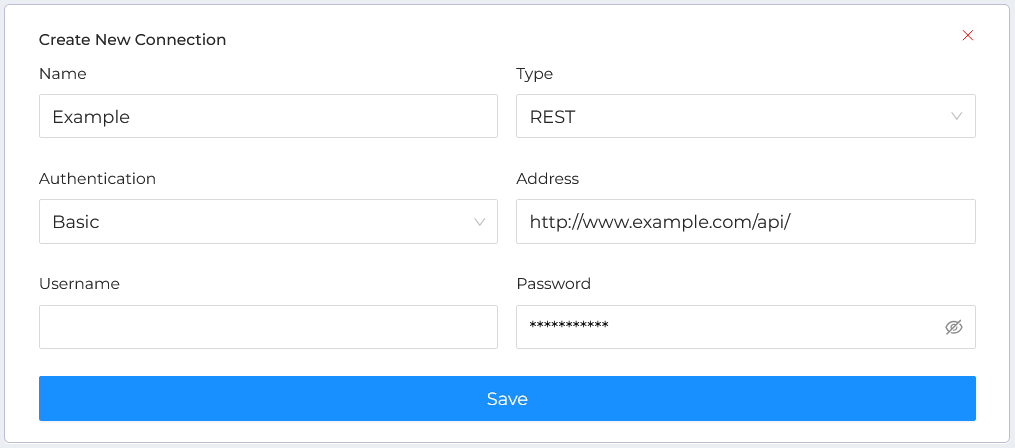
You can create a new connection by following these steps:
- Scroll to the bottom of the list of existing connections. Select + to create a new connection.
- Enter a Name for this connection.
- Select the Type of connection from the menu.
- Select the Authentication used for this connection. The kind of authentication used and details required are determined by the system you will be connecting with.
- Enter an Address for the connection.
- Save your connection.
Once you have saved the basic information, additional details become available depending on the connection type. Fill in the additional details as needed, being sure to save your connection. Once you've saved the details, this connection will be available when configuring the integration.

Test your connection
After you configure a connection, including test endpoints, you should test it to ensure it is configured correctly. Press Test in the connection interface to send a request to the test endpoint. The result of the test request will be added to the logs for this connection.
The logs include:
- The date and time of the test
- The data sent as part of the test
- Any messages returned from the request
If there are issues, logs can be helpful for troubleshooting your connection. The returned messages are generated by the system you're attempting to connect to, so be sure to have the documentation for that system on hand!
For example, in the image below, the URL that the test attempted to reach does not exist:

