


Step 2: Configure Settings
You can access your settings from the footer of your ItemPath site, or via http://[your URL or IP]/settings.
General Settings
(Required)
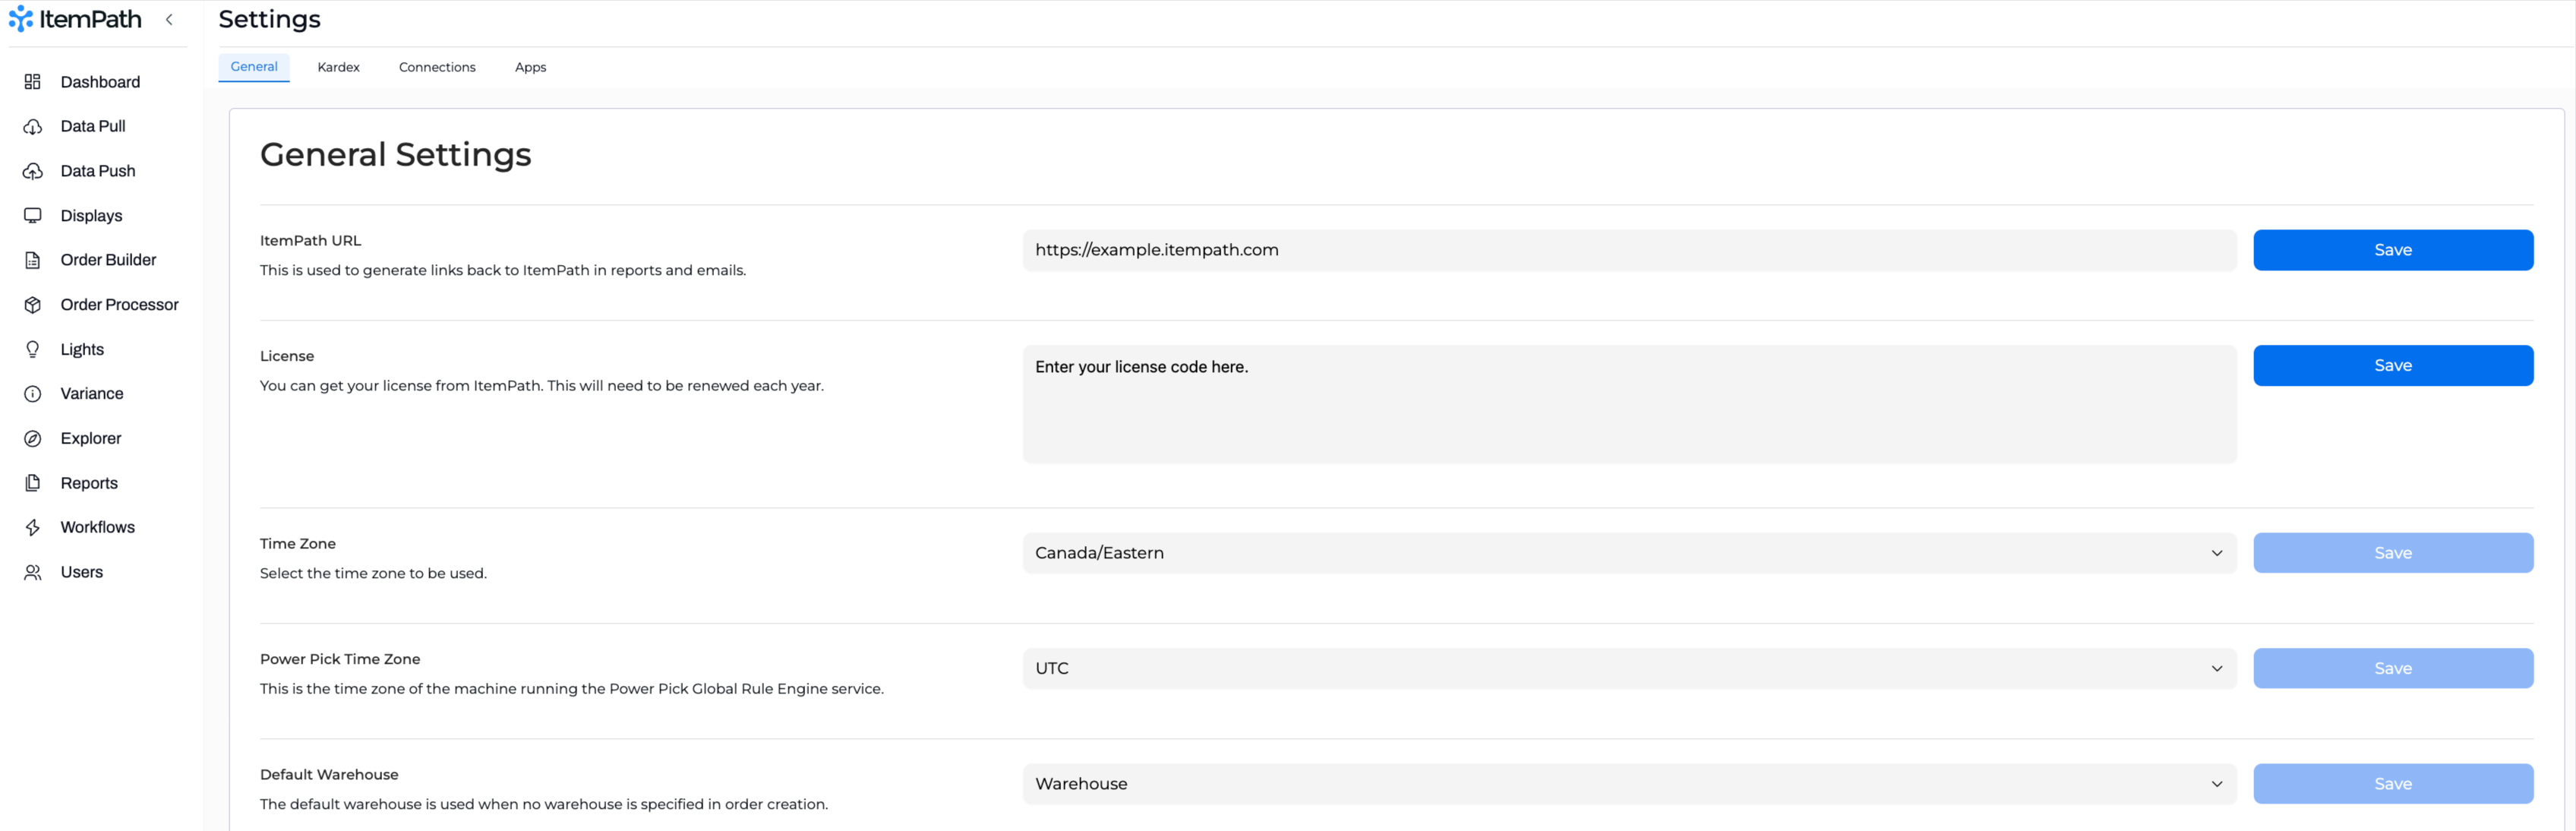
In the General tab, your base URL will need to be entered in the "ItemPath URL" field. This tells ItemPath how to generate links for new users and password resets.
- For cloud users, this will usually look something like "
https://[company].itempath.com" or "https://[company]test.itempath.com". - For on-premise users, this may be just be your IP address, or something else if you've rerouted it. The protocol will be
httpby default, orhttpsif SSL is enabled.
The license field will be filled in already, since you've entered it in the sign-up form.
You can also set a global time zone, which will be the default for all new users. If no time zone is set, the default time zone will be UTC.
Users can also set their personal time zone in their user settings. Setting this to a different time zone will override the global time zone setting for that user.
ItemPath uses the Default Warehouse and Default Material Property settings to establish global defaults when creating orders. If no warehouse is specified in ItemPath's API requests, the system uses the default warehouse for all users and applications. During material creation, the system uses the default material property if none is specified. The ItemPath default should align with the default material property in Power Pick.
Kardex (Power Pick) Settings
(Required)
In the Kardex tab, connections to Power Pick need to be set. ItemPath connects to Power Pick in two ways: with the rule engine and directly to the MSSQL server.
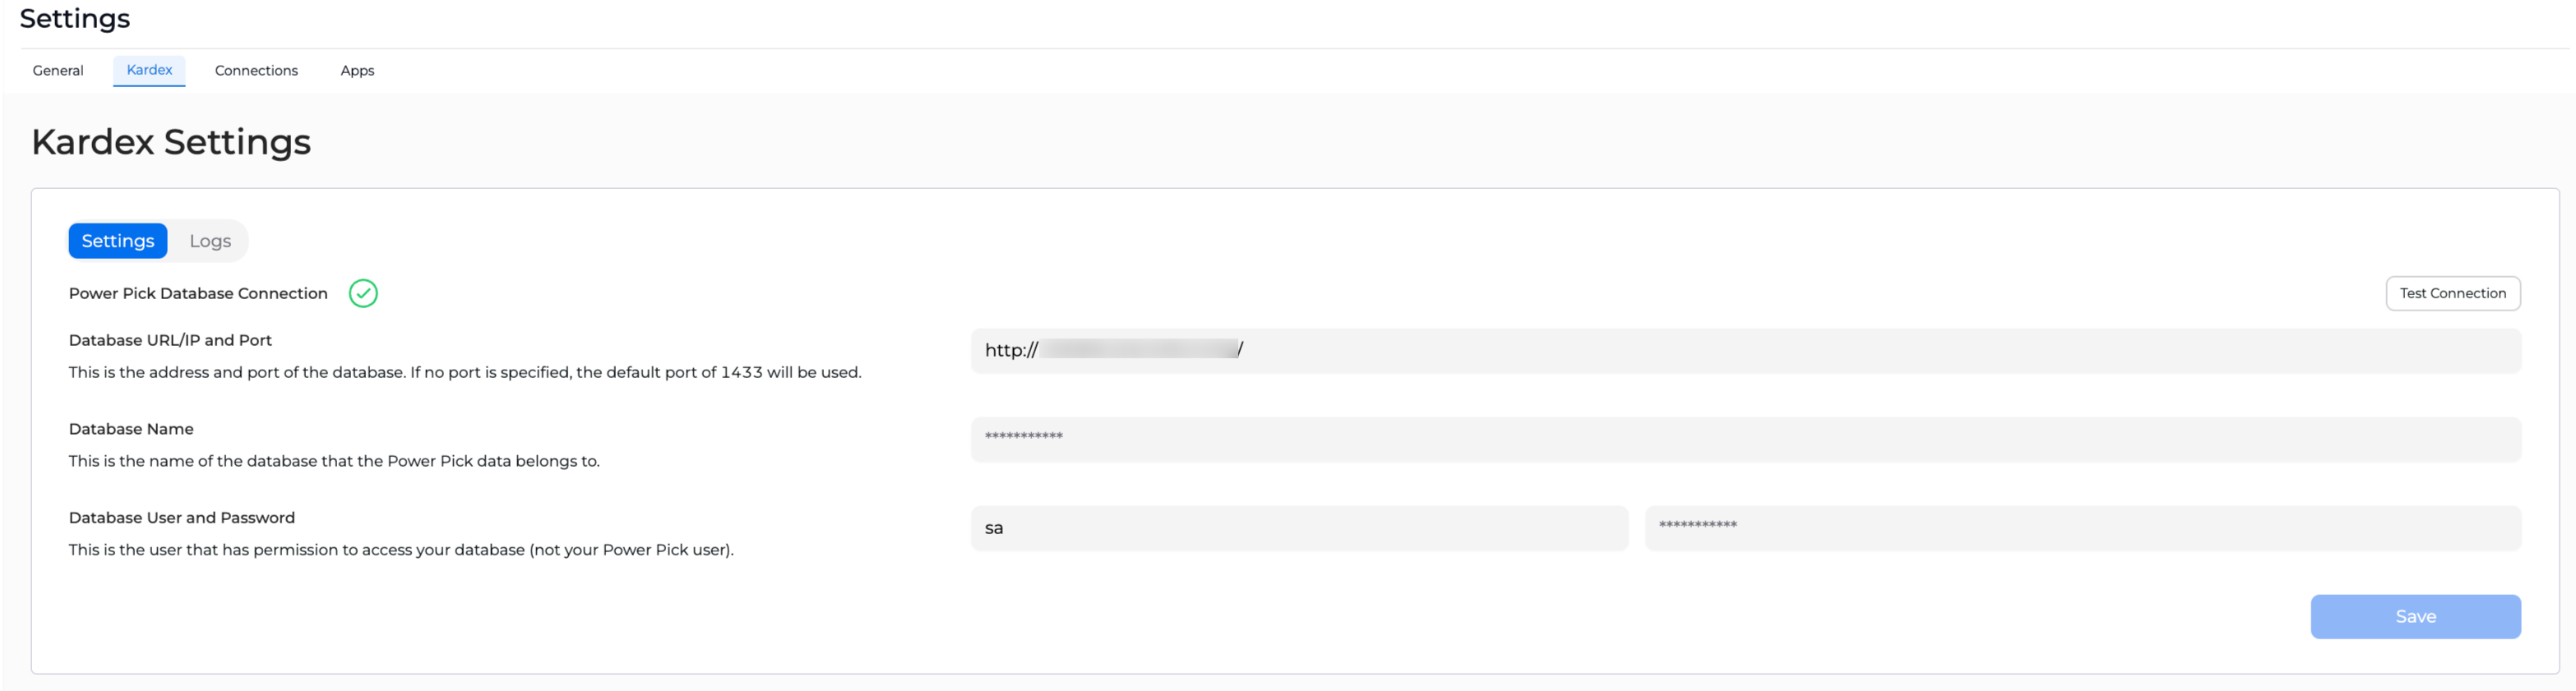
Power Pick Database Connection:
To get data from Power Pick, you'll need:
- Power Pick Database username, password, database name, dedicated IP address, and port number (if changed from the default port 1433). If ItemPath runs in the cloud, the dedicated IP address should be a public IP accessible outside of internal networks. Note: If using MSSQL, the Power Pick server must be set to SQL and Windows Authentication mode, as ItemPath does not currently support Windows Authentication.
- Your Power Pick database will need to be able to accept remote connections via IP. If using MSSQL visit the SQL server documentation for how to set this up.
Web Services connection:
If you are planning to use ItemPath to create or process orders, you will need a dedicated IP for your machine running the Power Pick rule engine, as well as a Power Pick username and password. The dedicated IP address should be a public IP accessible outside of internal networks, as ItemPath runs in the cloud.
If Web Services needs to be configured in Power Pick, visit the guide here for help with that.
(Note: A Web Services connection is not required if you aren't using ItemPath to create or process orders.)
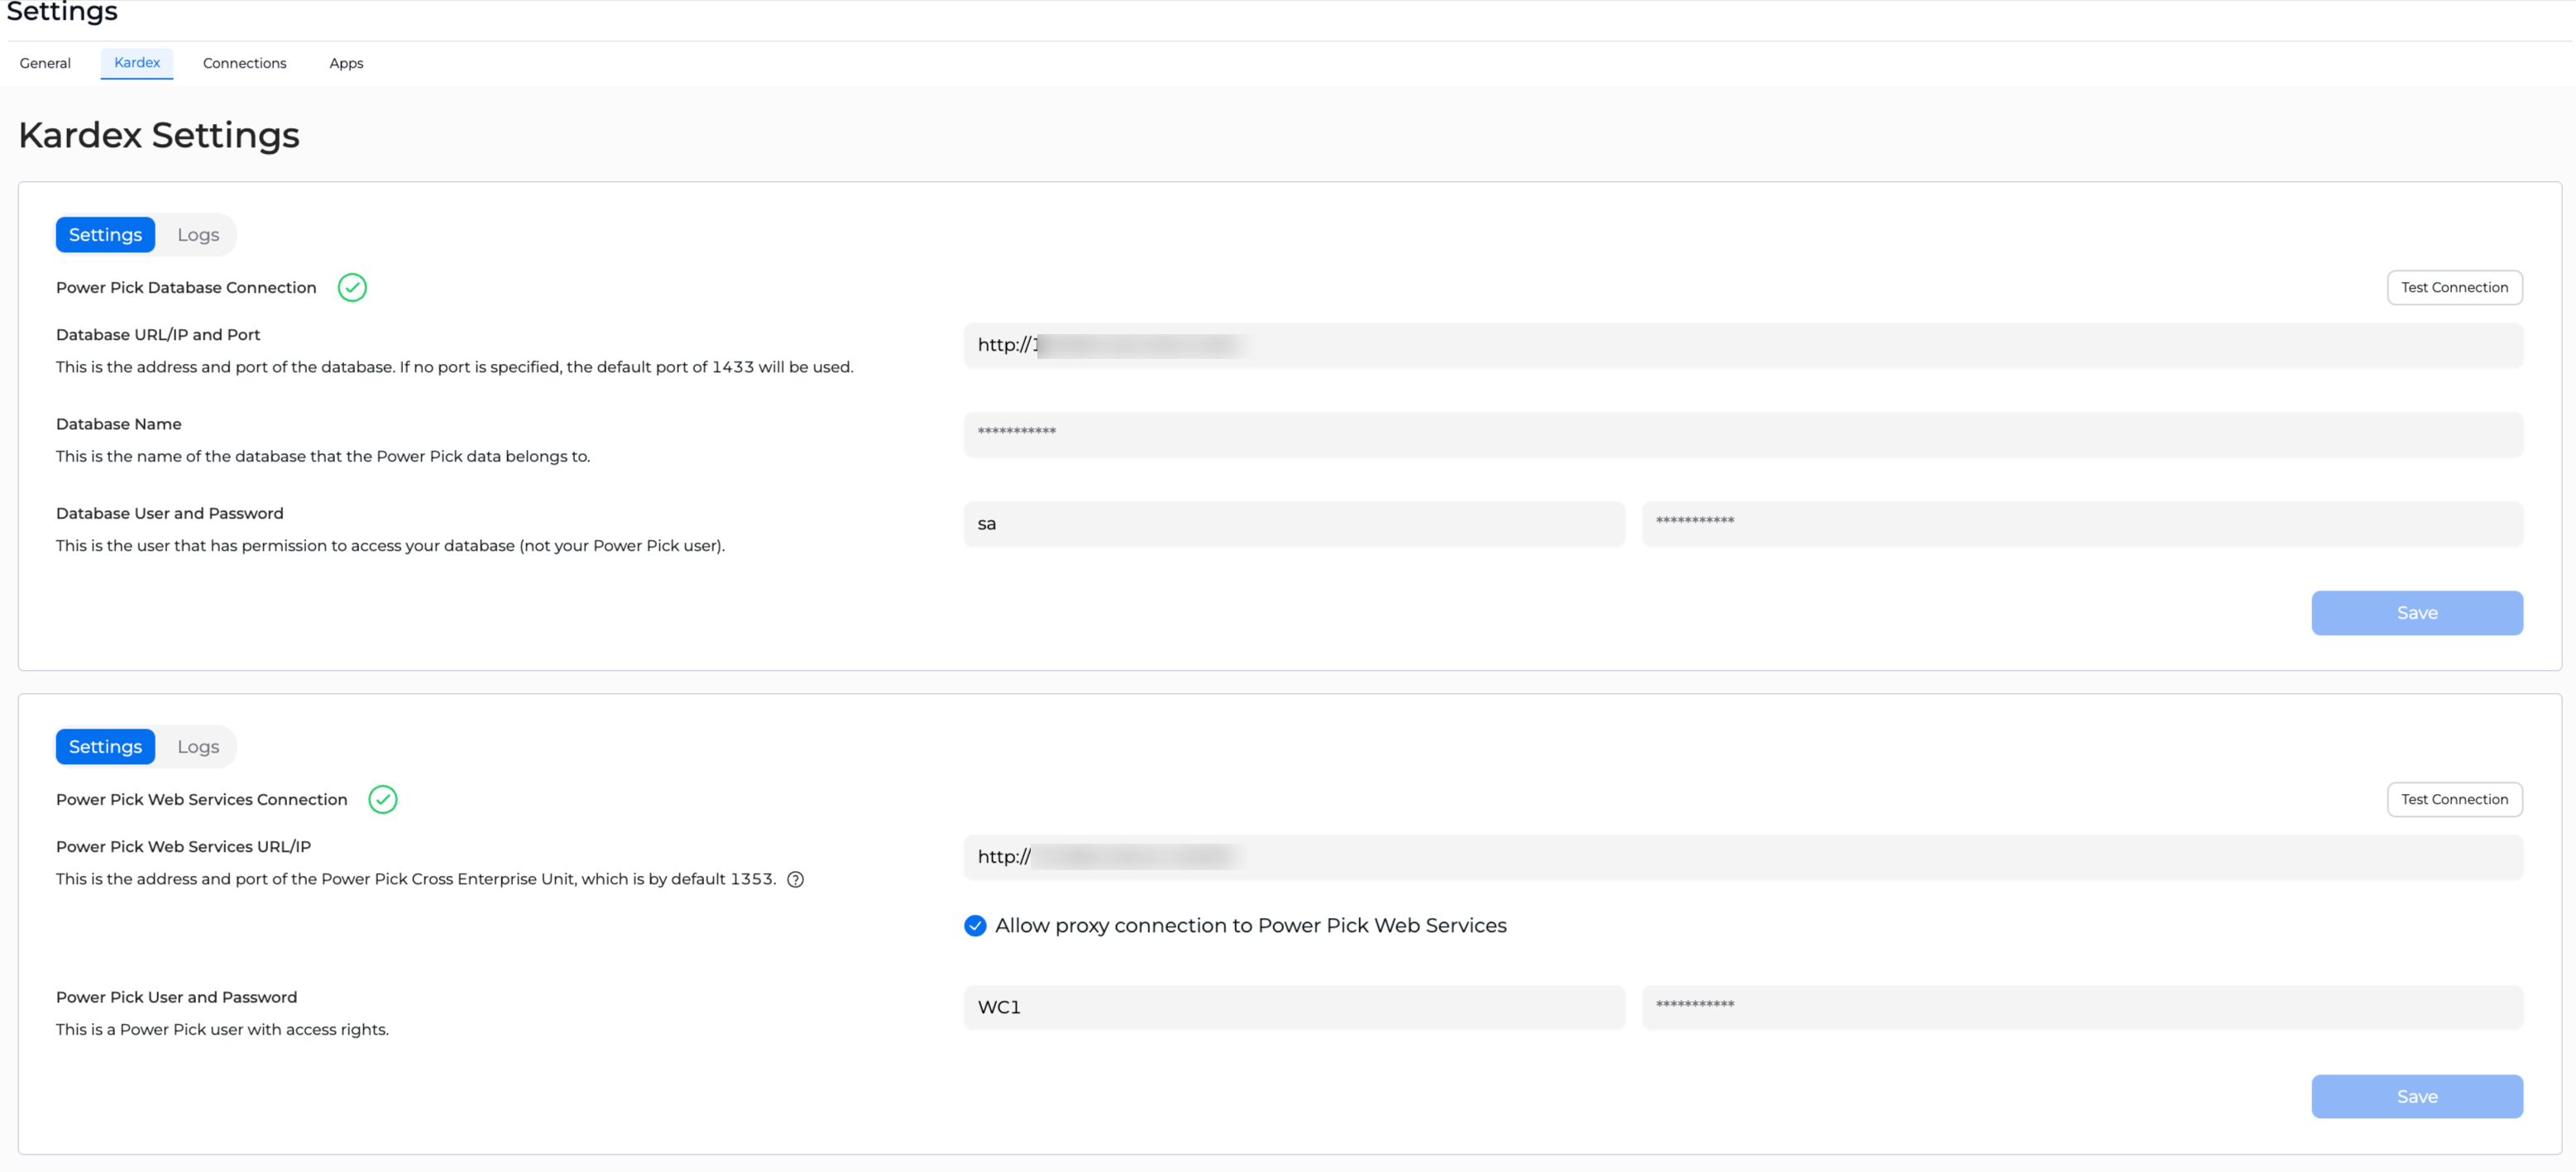
You'll see a Test Connection button for each connection, which you can click to check if the connection details were successful. Successful connections are indicated by a green check mark.
Connections Settings
(Required for Data Pull & Data Push Only)
In the Connections tab, the Data Pull and/or Data Push connection to your middleware needs to be set up. Before beginning, ensure that you know the kind of authentication required for your middleware. For the purposes of this course, we'll set up a REST API connection, but ItemPath supports various types of connection and authentication.
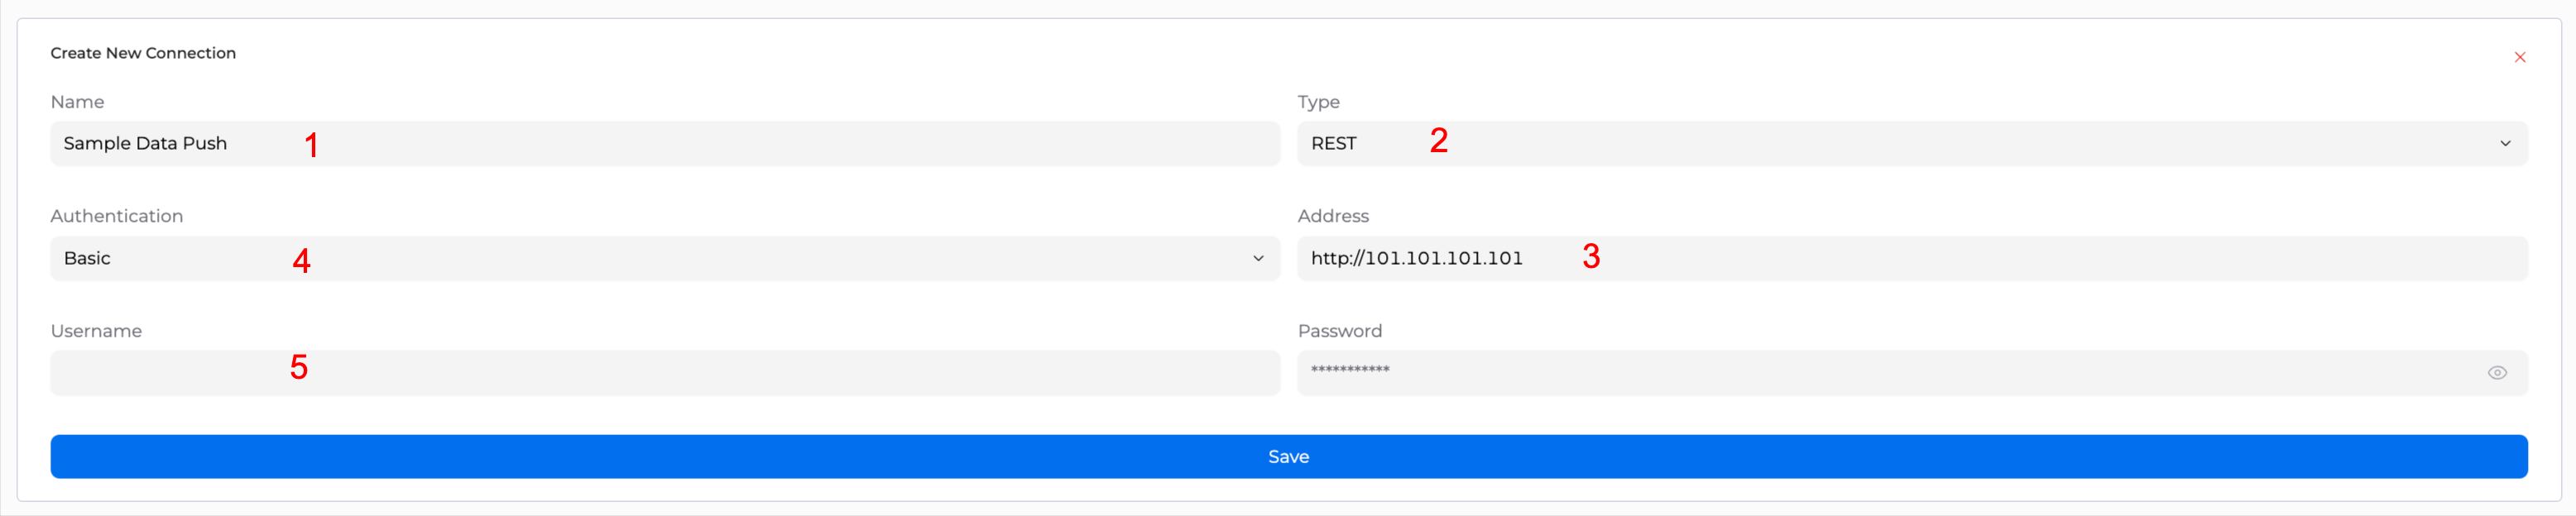
Select + to start a new connection and follow these steps:
- Give the connection a Name you choose.
- Set the Type to "API" > "REST".
- Enter the base Address of the API call. (The path will be configured later when creating an integration.)
- Select the Authentication Type used by your API.
- In this example, our middleware uses password based authentication, so we will need to provide both the username and password in ItemPath.
- Save your changes.
Once these settings are saved, you'll be able to set the test endpoint (usually /ping.) You can also enter headers that will be sent for all Data Push calls. For authentication keys, we recommend checking the Private box to indicate confidentiality. Those keys won't show in up any logs.
Test the connection and check for a green check mark confirmation.
Apps
The Apps tab is where you can access settings for additional apps that extend ItemPath. It will not be visible if you haven't purchased any additional apps.