


Building a Report
Follow this walkthrough to create your first report from scratch.
To start, click the New Report button in the top-right corner of the screen.

You'll be prompted to choose a theme for the report. Report themes determine which table in PowerPick the data will be pulled from.
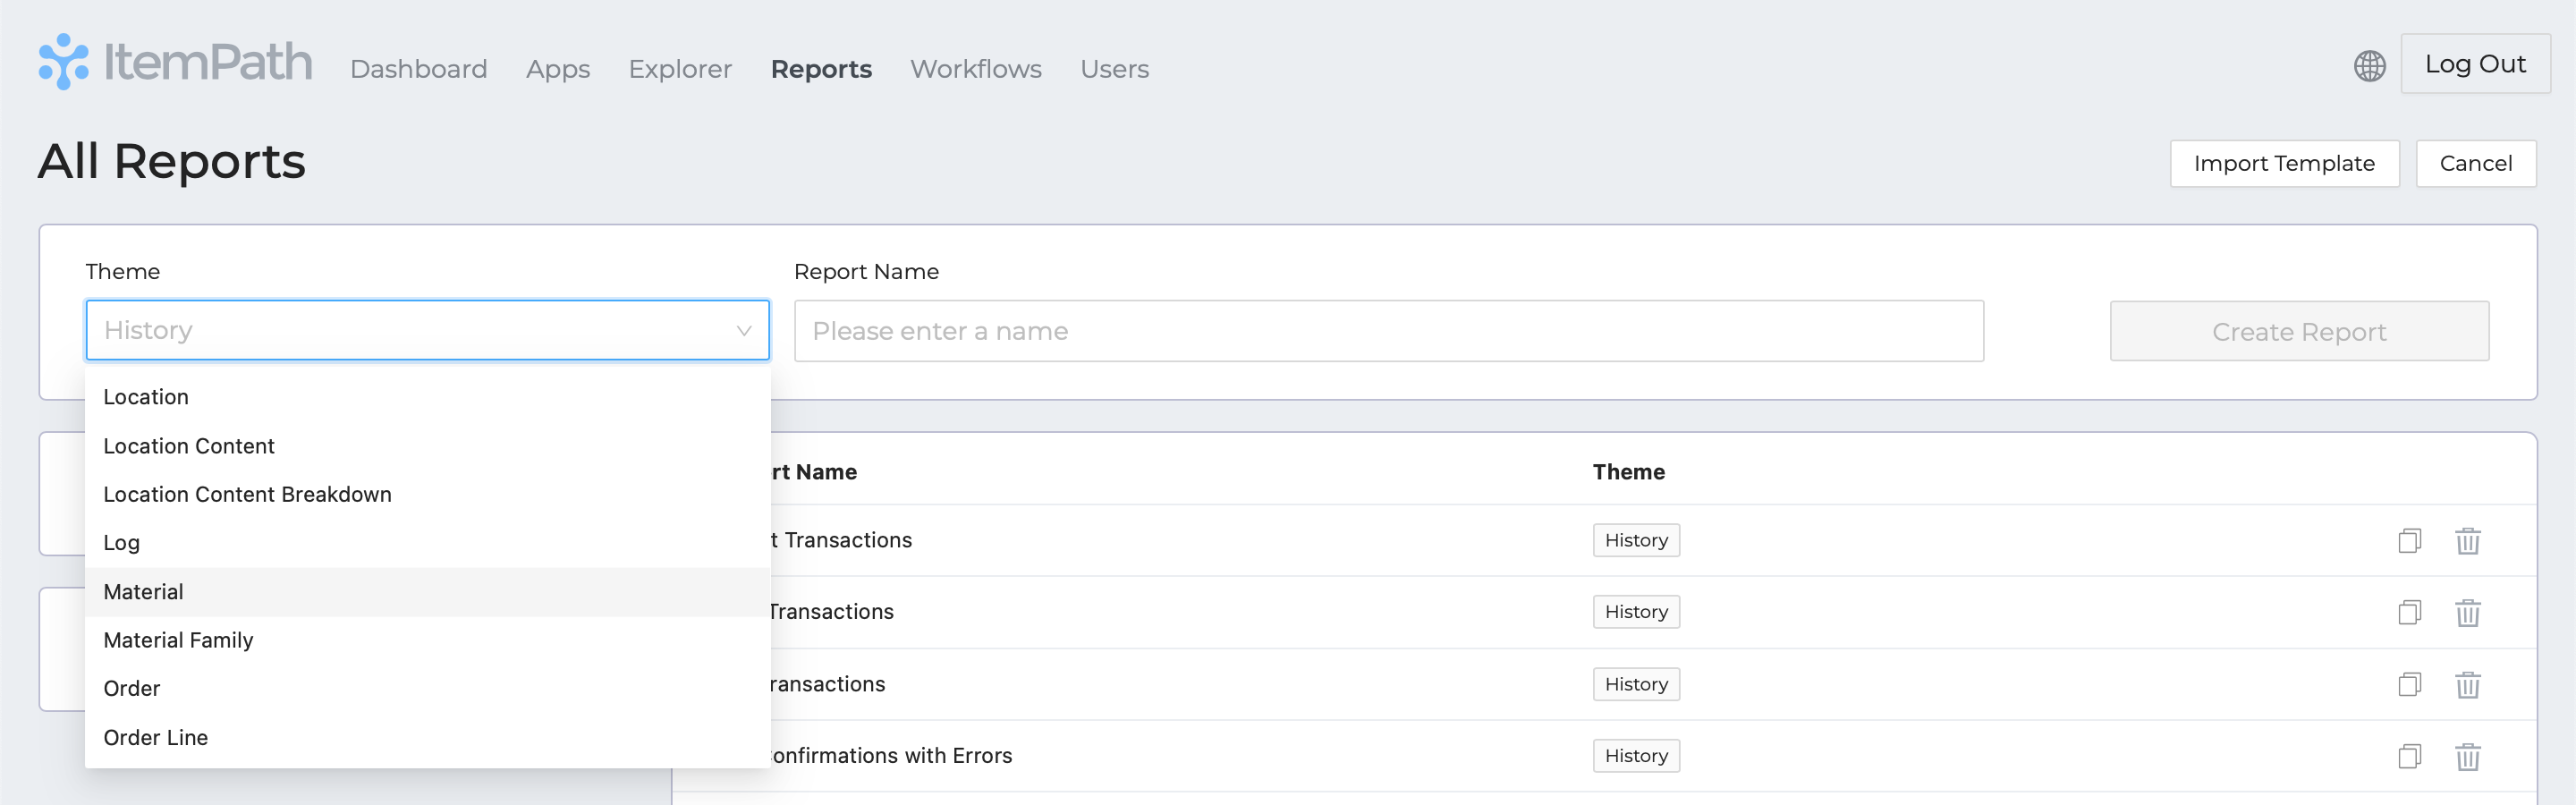
In this case, set the theme to History. This is also the default theme.
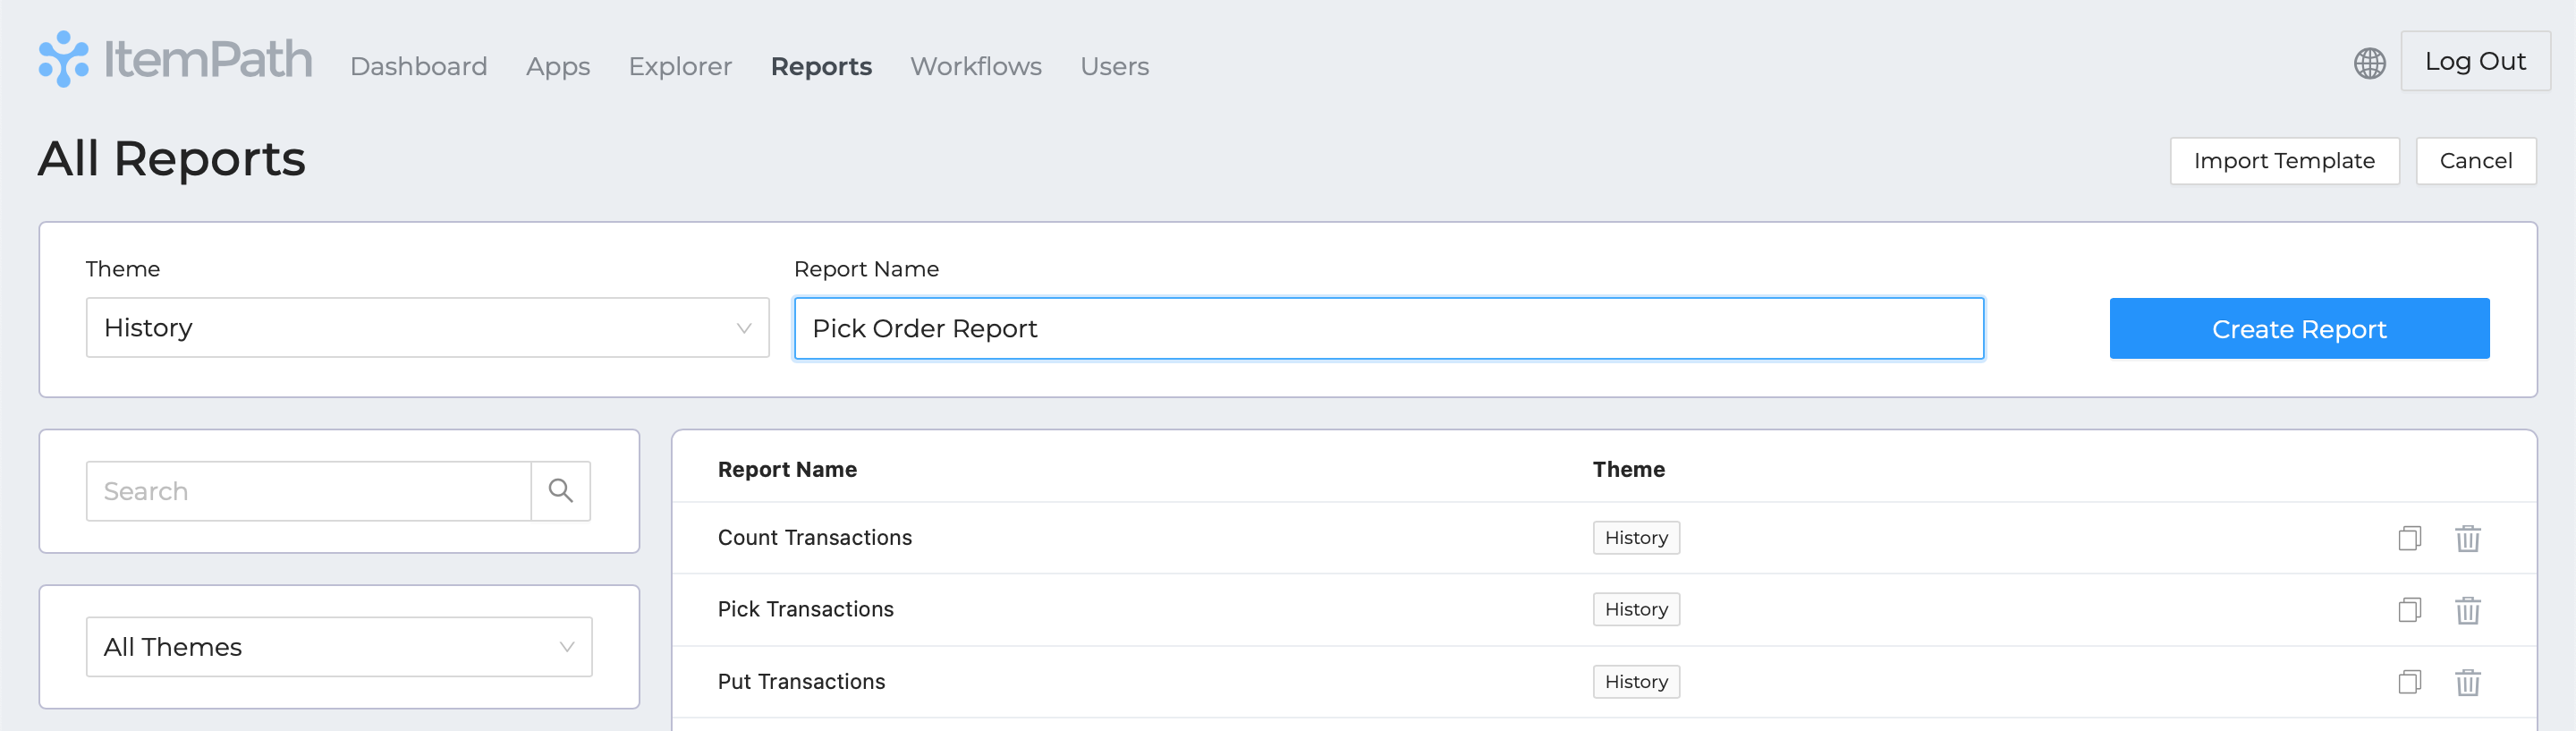
The next step is to give the report a name. The report we'll be building will be about completed Pick Orders, so the name should reflect that.
Tip: It can be helpful to note that this report is for learning/testing, and/or you could add your name or initials to the report name to help identify it.
When you're satisfied with the name and theme, select Create Report to continue.