Something look different? Check your current version in the ItemPath footer, or contact
support@itempath.com
to ask about upgrading.
Integration Settings
Add an Integration
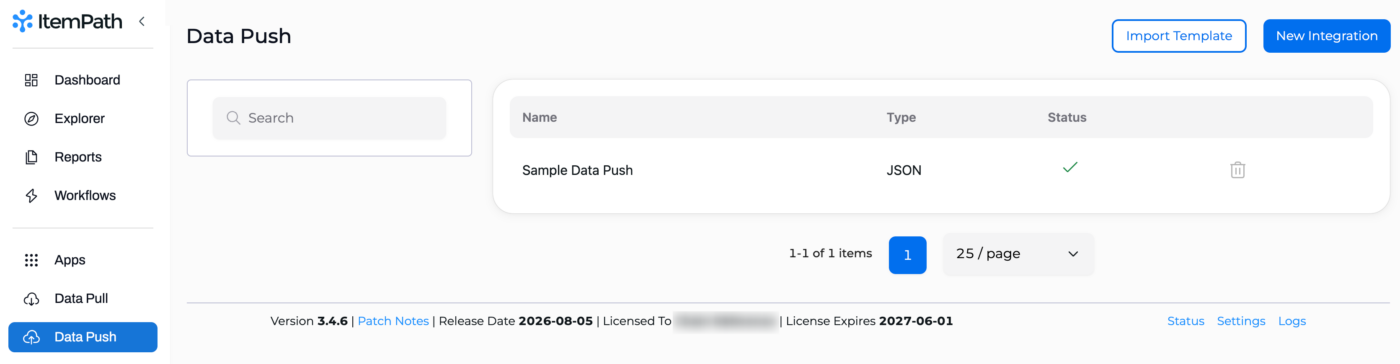
Now that the connection is set up, go to the Apps tab and click Data Push. There you'll see the list of integrations and a button to add a "New Integration" in the top-right corner. Click to get started.
Give the integration a name, ideally one that demonstrates what kind of data it will be used to send.Set the format to "JSON" and select the connection you set up in the first step from your ItemPath site's Connection Settings.
Integration Settings
Once an integration is created, you can click on it to look at the details. In the Settings tab, you'll see these options:
General: Change the integration name, format, or connection type.
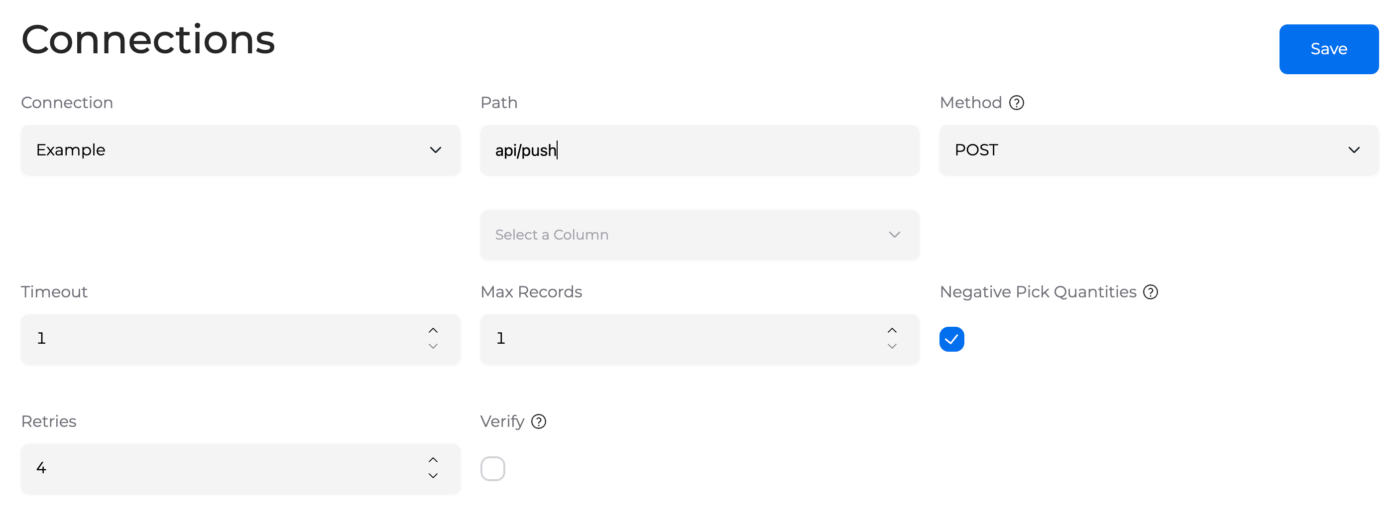
Connections: This is the extension of the connection base.
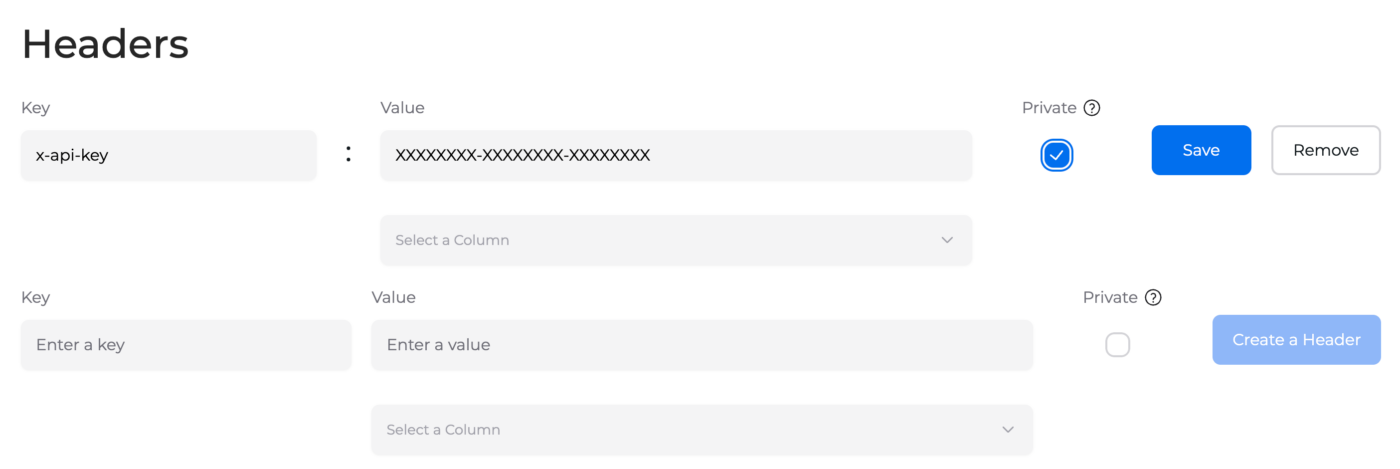
Headers: Add or remove headers that should be included, like authorization tokens.
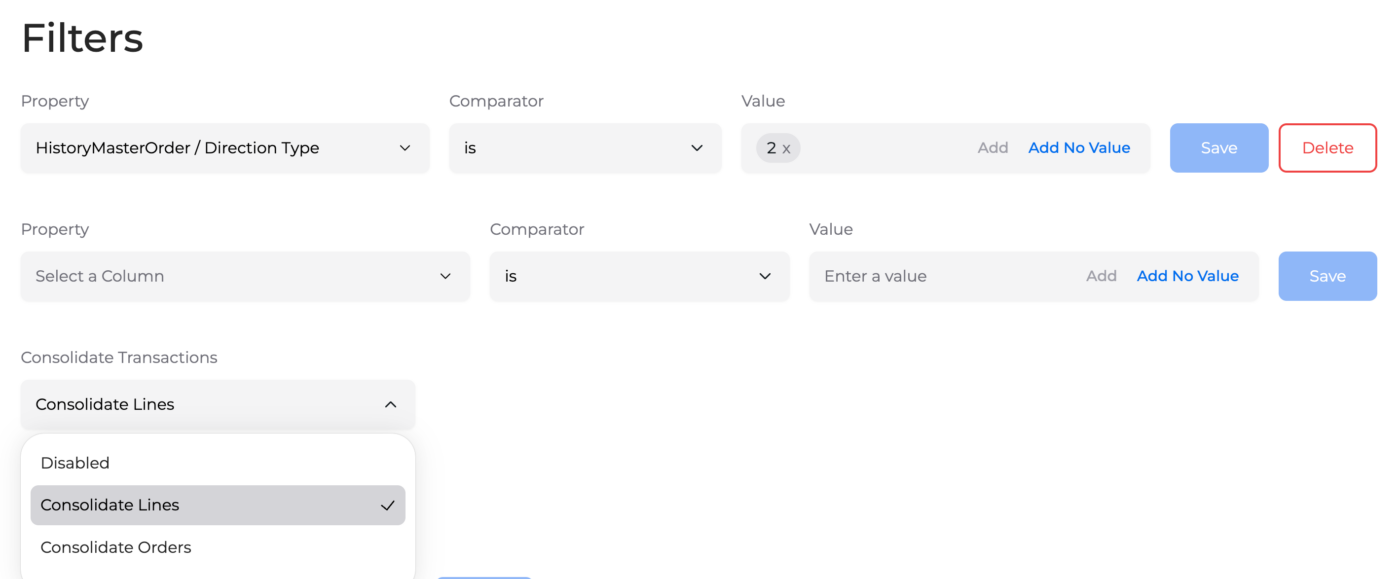
Filters: Filter by values like history type and motive type. Leaving these blank will include all types. Consolidate all transactions for individual order lines or orders. For more information on the available fields to filter by, see Report Data Reference.
The integration status defaults to Inactive. To activate it, toggle the switch in the top-right corner of the General section to Active.
Connection
The Path entered here is the endpoint these transactions are being sent to. The path is an extension of the Data Push connection set up in ItemPath's global settings.
Checking Verify will require SSL certificate verification for this endpoint.
Timeout is the number of seconds that can pass without a response before Data Push logs a timeout error. The default is 10 seconds, and the maximum is 90 seconds.
Max Records is the highest number of transactions that can be processed in one second, for high volumes of records. The default is no limit, and the maximum is 100 records.
Retries indicates to Data Push how many times a transaction should automatically be resent if it fails to export, before being marked with an export error and moved to the Failed Attempts tab. The default is 1 retry, and the maximum is 5 retries.
Method is the HTTP method used for making the call.
Make sure to save each change as you update these details.
Important Note: Editing and Publishing (Version 3.5.0 and later)
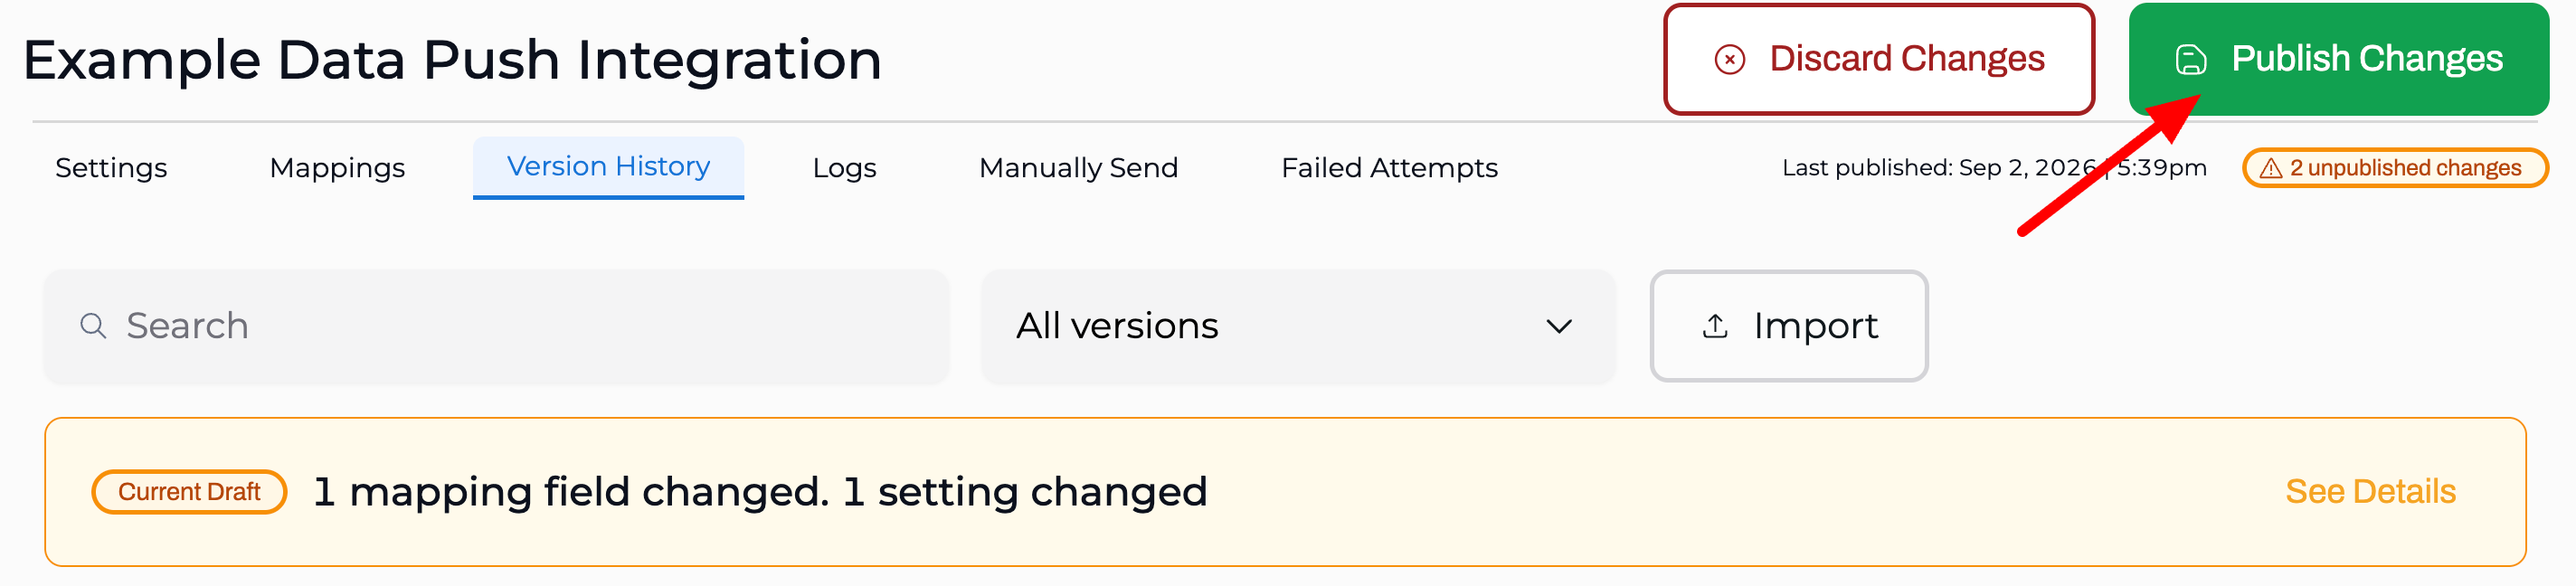
If you are using ItemPath 3.5.0 and later, it's important to note that any changes to the Connections, Headers and Filters will automatically create a draft version of your integration if one does not already exist. If a draft version exists, the changes will be added to the current draft. These changes will not be published automatically.
Navigate to the Version History tab to see the full details of any draft.
When you've finished making your changes, click Publish Changes. For more information on Version History, click here.
Headers
The headers entered here will apply to each transaction sent with this integration. These are also in addition to any global headers set up in the Data Push connection.
Check the "Private" box if these headers are used for authentication and should not be shown in the logs.
Filters
One of the benefits of having multiple integrations is having unique mappings for different types of transactions. These filters are where you select which transactions should be sent by this integration.
Leaving filters blank will mean that transactions of all types are to be passed by this integration.
You can filter by any column from your transaction data.
To add a new filter:
Select the Property you would like to filter on (e.g., History > Type).
Select the comparison operator (comparator) to use for the filter. (e.g., "is").
Specify the values for your filter condition (e.g., "1", "3"). If you enter multiple values, ItemPath with use "OR" logic to assess the criteria. (e.g., "Type is '1', '3'" will be treated as "The type is either 1 or 3".
Save.
After saving, a delete button will appear beside your saved filter, and a new row will appear so that you can enter any additional filters. If you save multiple filters, they will apply using "AND" logic (transactions must meet all saved filters to be sent with the integration).
Note: Be careful when using multiple filter criteria or filtering on multiple values. It can be helpful to have a sample transaction in mind that should be sent as part of the integration, and you can use that to validate that it will pass each criterion.
v
Consolidate Lines
This option allows you to determine how Data Push will consolidate transactions:
When disabled, Data Push will send data for each transaction completed.
When set to Consolidate Lines, Data Push will send transactions for each order line completed.
When set to Consolidate Orders, Data Push will send transactions for each order completed.
To understand how consolidation works, it's important to know that Power Pick records every step of processing an order as a separate transaction. Here's an example:
You have 1 order line requiring a quantity of 20 be picked for material A.
Transaction 1: Employee 1 begins picking from Location 1 but there are only 5 items in that location. They pick these 5 and have to move to another location.
Transaction 2: Employee 1 picks an additional 9 items from location 2 and then goes on break.
Transaction 3: Employee 2 picks the remaining 6 items from location 2 and completes the order line.
Consolidation Disabled
If you have consolidation disabled, Data Push will send 3 confirmations for the above scenario. 1 for each transaction. Like this:
Transaction 1:
"qty": 5
"material": "material A"
Transaction 2:
"qty": 9
"material": "material A"
Transaction 3:
"qty": 6
"material": "material A"
Consolidate Lines
If you have consolidation set to "Consolidate Lines", Data Push will wait to send 1 confirmation when the order line is completed.
ItemPath Version 3.4.10 and older
The data we return for the above example would list the material name and quantity for each transaction.
Example:
"qty": {"Transaction ID 1": 5, "Transaction ID 2": 9, "Transaction ID 3": 6 }
"material": {"Transaction ID 1": "material A", "Transaction ID 2": "material A", "Transaction ID 3": "material A"}
If however, there was only 1 transaction, it would look like this:
"qty": 20
"material": "material A"
ItemPath Version 3.5.0 and later
The format of the consolidated transactions will depend on your selected Output Mode.
Object Array: Outputs a list of JSON objects
Primitive Array: Outputs a simple flat list of single values
Keyed Object: Keys each record by its unique History ID.
When Collapse Single Item is enabled, if only one record exists, it flattens from an object to a plain value.
Aggregate: Summarizes all records into a single calculated value instead of a list.
Aggregate Function: Count, Sum, Min, Max, or Avg.
Aggregate Source Column: Select the column used for the calculation.
If you have consolidation set to "Consolidate Orders", Data Push will wait to send 1 confirmation when the entire order is completed. Let's assume we have an order with 3 order lines. The materials and quantities would be grouped together the same way as consolidating lines (above), however there would be more transactions depending on the size of the order and the steps taken to complete it. Which means you would typically have a much larger number of transactions to list.