


Creating a Widget
Watch this video tutorial or follow the steps below to set up a widget on your Dashboard.
In your Dashboard, navigate to the view you want to edit (or start a new view, either from scratch or copying another view as a template) and click Edit View to begin.
If you do not have the ability to create or edit a Dashboard view or, your user role might not have that permission enabled.

Click the Add New Widget (1) button. Two buttons over the right is the Edit Widgets button—click it to enter editing mode.
Toggle the pencil icon (2) to give the widget a name, then click the checkmark to confirm. To delete a widget, click the trash can (3).
To save your changes, click Finish Editing (4) where the Edit Widgets button was.
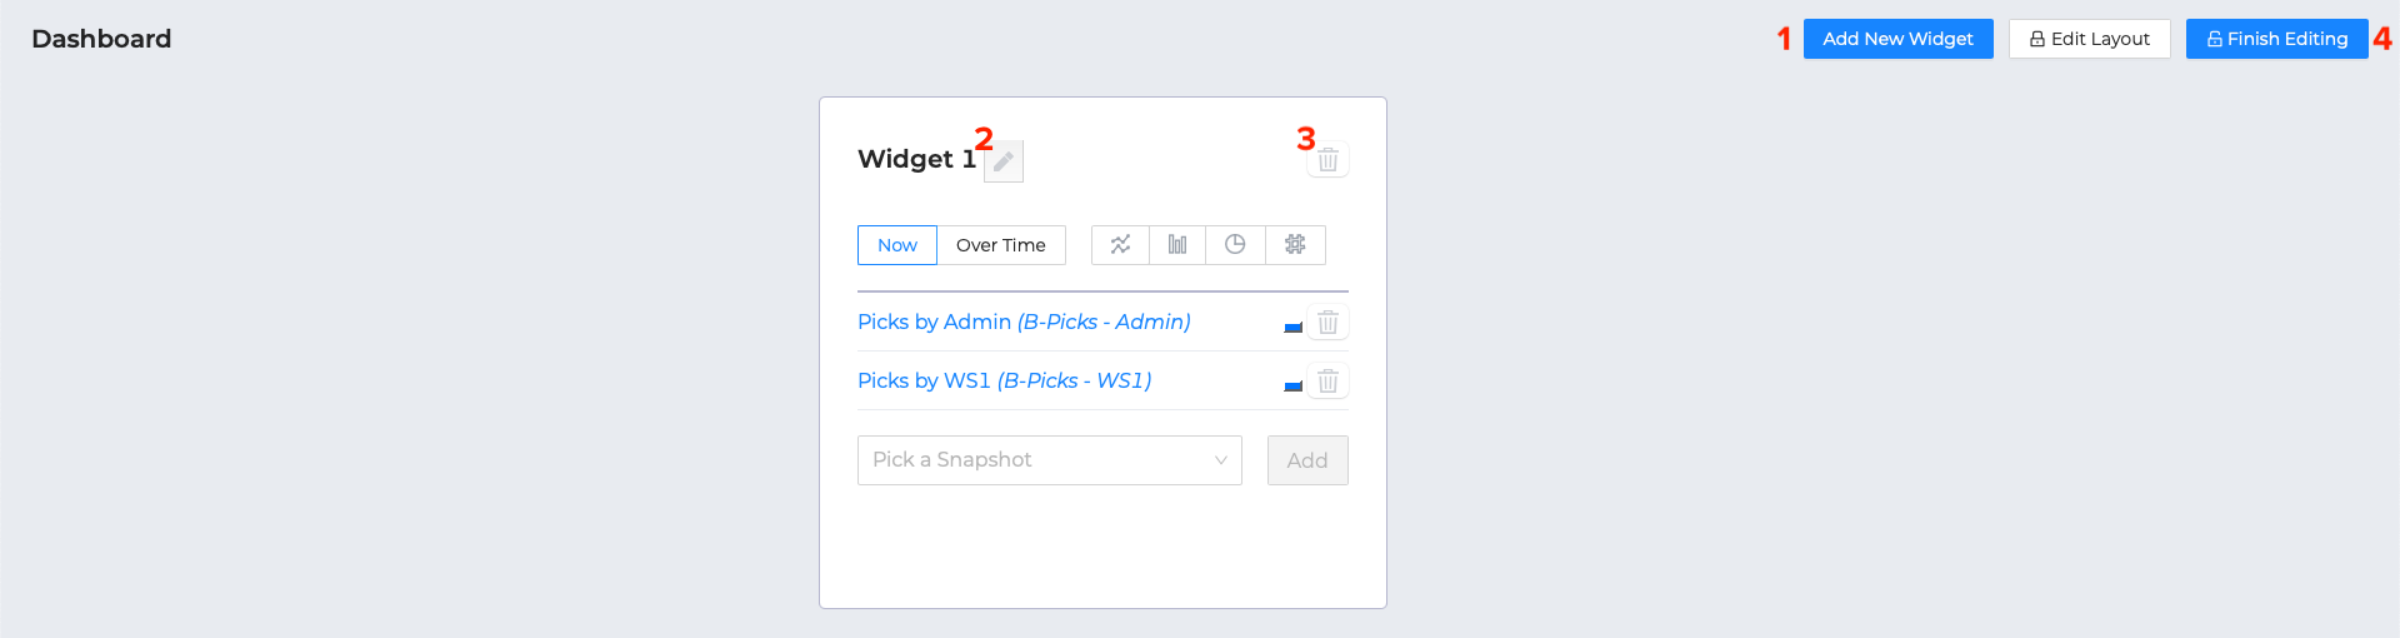
To move and resize your widgets, click the middle Edit Layout button at the top-right. In this mode, you can drag and drop your widgets around the Dashboard, and use the resize handle in the bottom-right of the widget.

Add a Snapshot to the Widget
- Select one or more Snapshots (created earlier) that will generate the data for this widget.
Note: The Snapshots must be related to the same report theme to work together. - Choose "Now" or "Over Time" to match the type of snapshot(s).
- Select one of the graph or text output types that will work with your type of snapshot(s).
The new Widget will be added to dashboard.