- Docs
- Data Push Overview
- Connection Settings


Configuration
-
Installation
-
Updating
-
Settings
-
Logs
-
API
-
Reports
-
Snapshots
-
Workflows
-
Dashboard
-
Explorer
-
Users
-
Resources
-
Custom Fields
-
Cycle Counts
-
Data Pull
-
Data Push
-
Displays
-
Lights (Philips Hue)
-
Order Builder
-
Order Processor
-
Variance
Connection Settings
Set the Connection
To set up your Data Push app, you will need to first add the connection in your ItemPath site’s Settings.
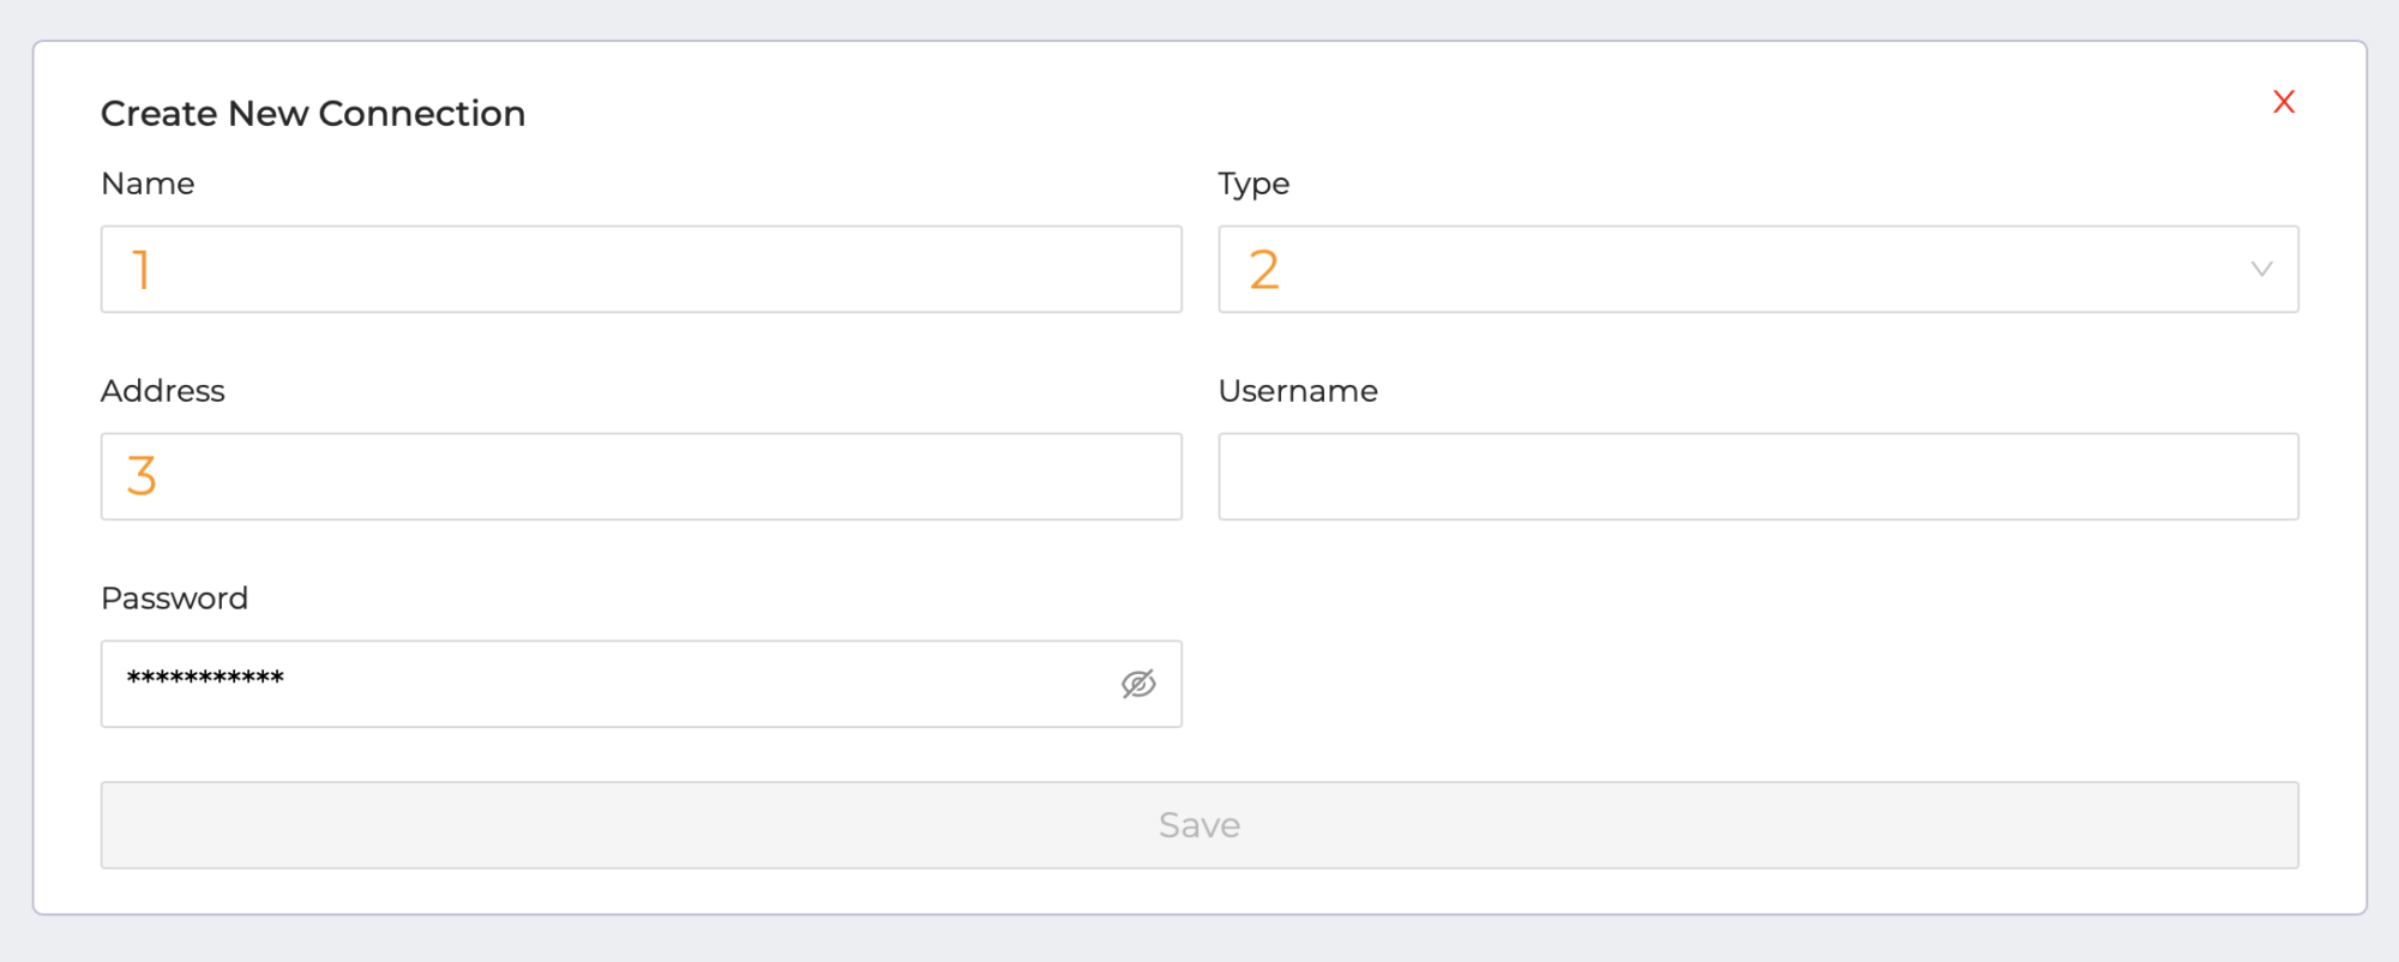
In the Connections tab, click the “+” button to start a new connection and follow these steps:
- Give the connection a Name you choose.
- Set the Type to your software, or "API" for most connections.
- Choose an Authentication Type.
For most API connections, a "No Auth" connection type will be used and tokens will be passed in the header, or a "Basic" connection type will allow a username and password. Other available connection types (NetSuite, PLC, SQL, etc.) will open or close additional authentication fields.
- Choose an Authentication Type.
- Enter the base Address of the API call. (The path will be configured later when creating an integration.)
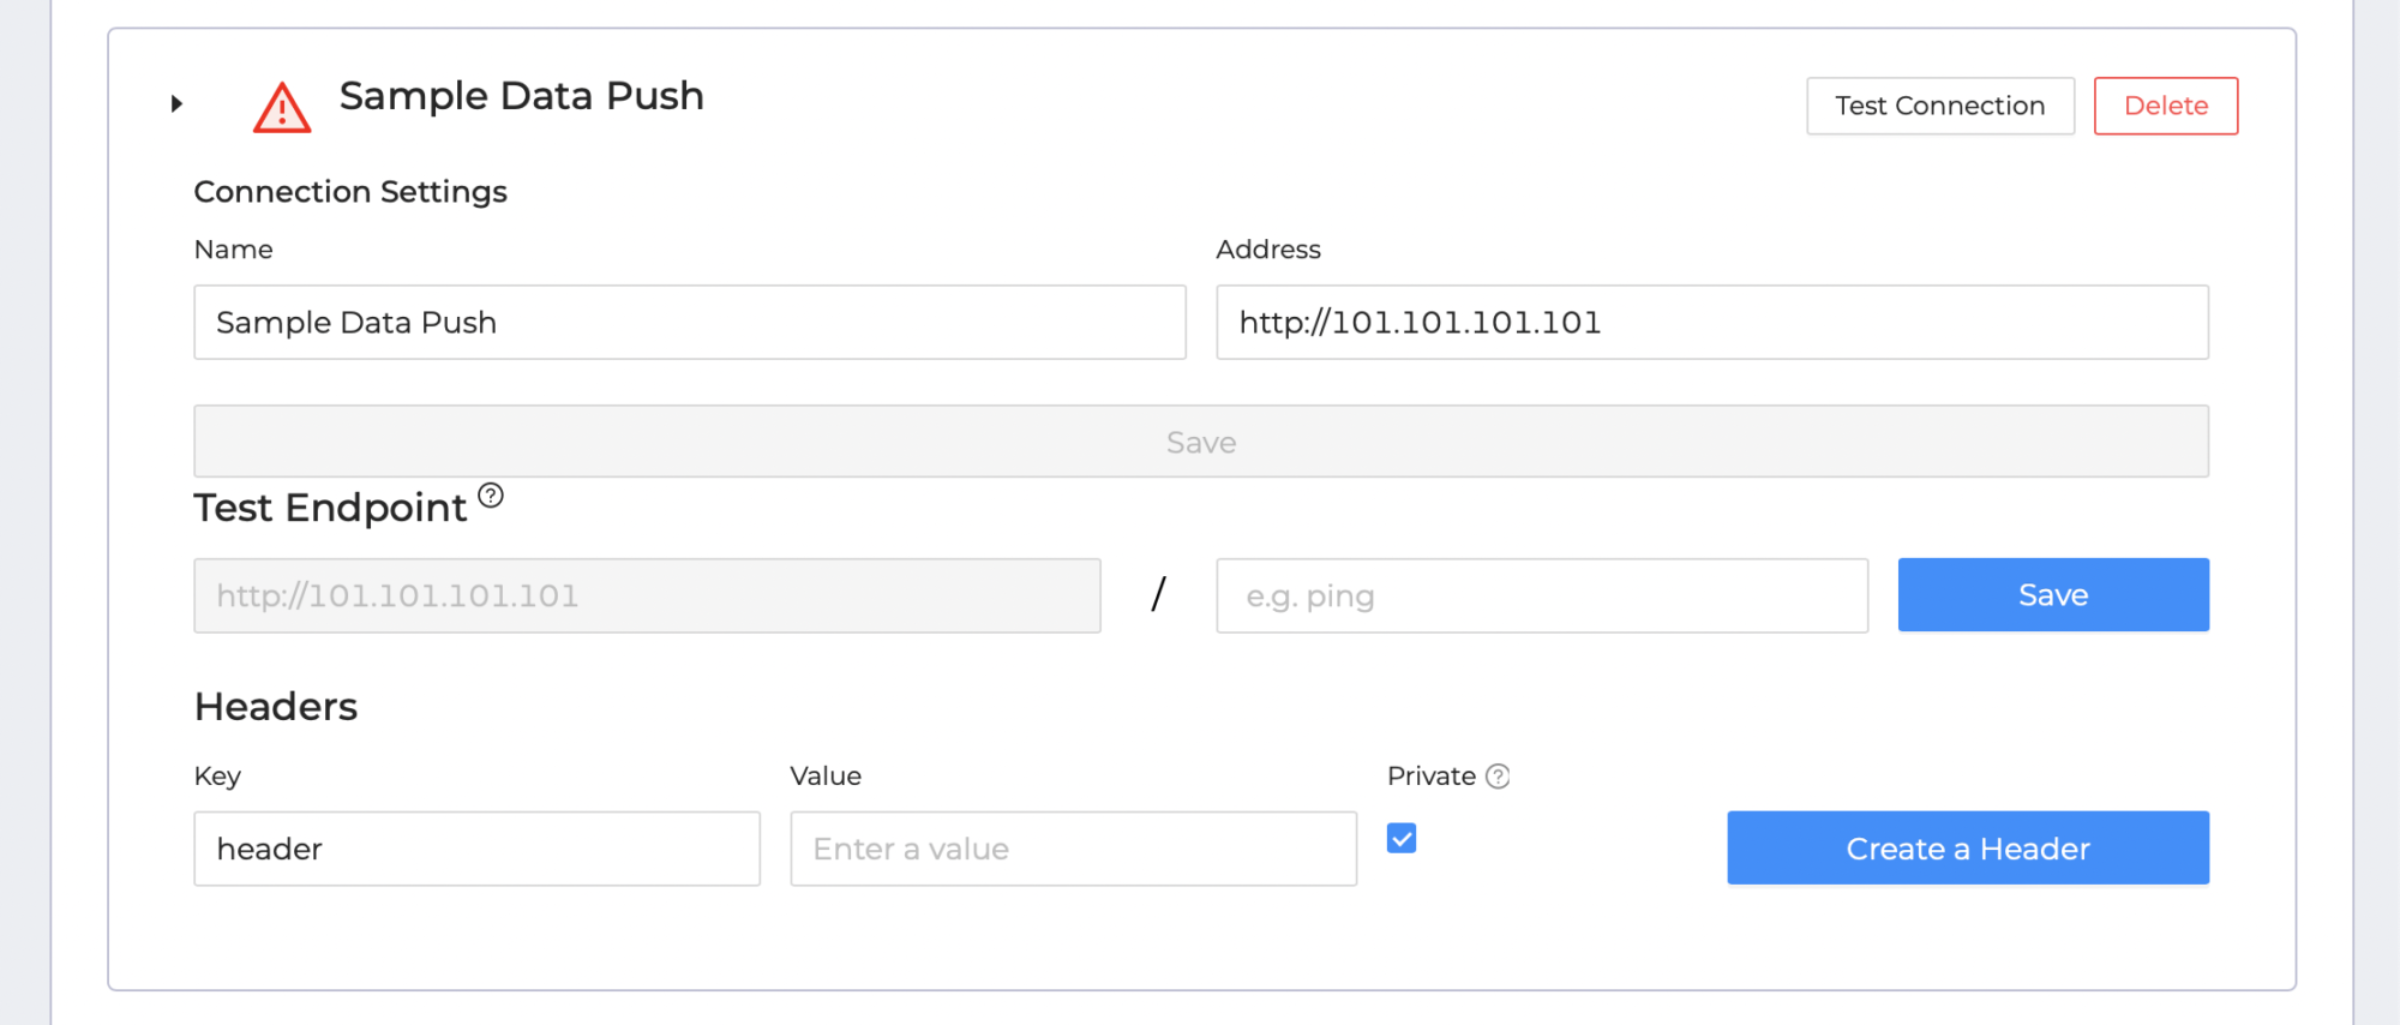
- Click "Save" to open next steps.

Once these settings are saved, you'll be able to set the test endpoint (usually /ping.) You can also enter headers that will be sent for all API calls. For authentication keys, we recommend checking the Private box to indicate confidentiality. Those keys won't show in up any logs.

Test the connection and check for a green checkmark confirmation.

