- Docs
- Workflows Overview
- Setting Triggers
-
Installation

-
Updating
-
Settings
-
Logs
-
API
-
Reports
-
Snapshots
-
Workflows
-
Dashboard
-
Explorer
-
Users
-
Resources
-
Custom Fields
-
Cycle Counts
-
Data Pull
-
Data Push
-
Displays
-
Lights (Philips Hue)
-
Order Builder
-
Order Processor
-
Variance
Setting Triggers
You can adjust your trigger name at any time by clicking the edit icon (1).
To set a trigger, choose one of the regularity options (2) from the dropdown list, then enter the specific day (3) and time (4) of occurrence. Click Save (5) to keep your selections.
Toggle your workflow on or off with the switch underneath Active (6), or delete it altogether from the right-side panel (7). (To delete just a trigger, you'll need to click Remove to the right of the criteria.)

Now, choose a report from the dropdown menu (1). This is the report that will be checked for the criteria you choose in order to trigger the workflow. Set your comparison (2) and value (3) that the workflow will check for and click Add (4) to save.

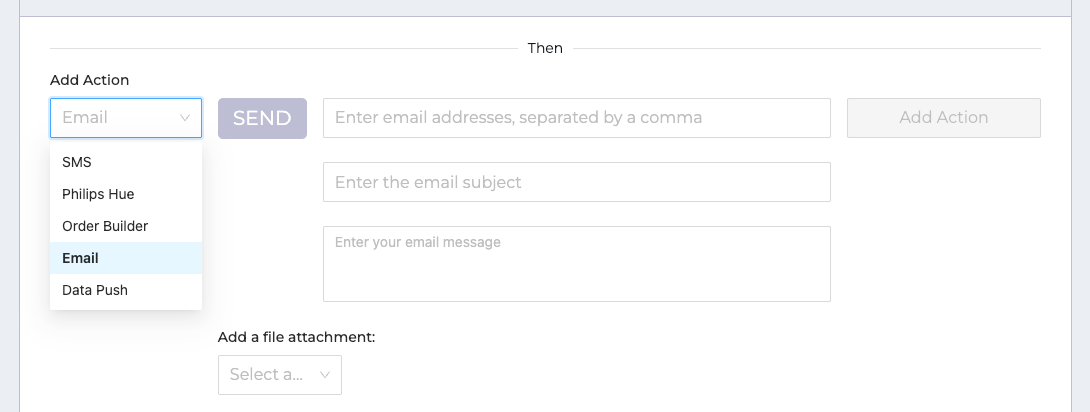
Finally, select the action. You'll be able to choose from your connected apps in the dropdown menu. Depending on the app or method of communication, you will need to fill out a few more details, like the email address and content in this example. Once the information has been entered correctly, click Add Action.
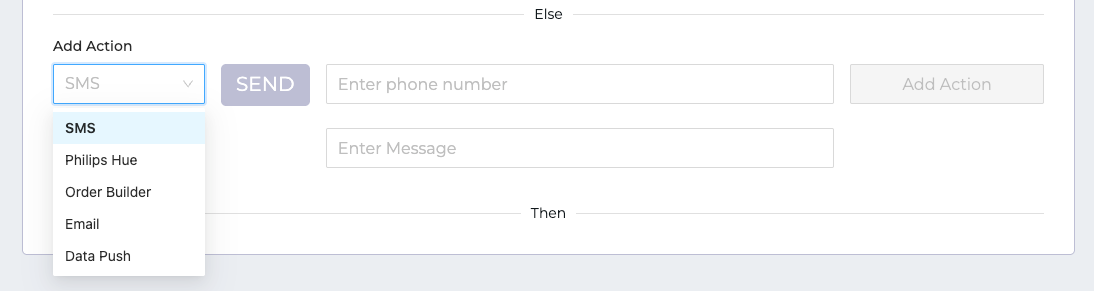
You can also set an "Else" action, which will happen if the criteria is NOT met when the workflow is run. The action options will be the same; you can use the same app as before, or choose something else, like this example.
*It is best to create a new trigger for each report/file type and app/communication grouping.