Integration Settings
Add an Integration
Now that the connection is set up, go to the Apps tab and click Data Push. There you'll see the list of integrations and a button to add a "New Integration" in the top-right corner. Click to get started.
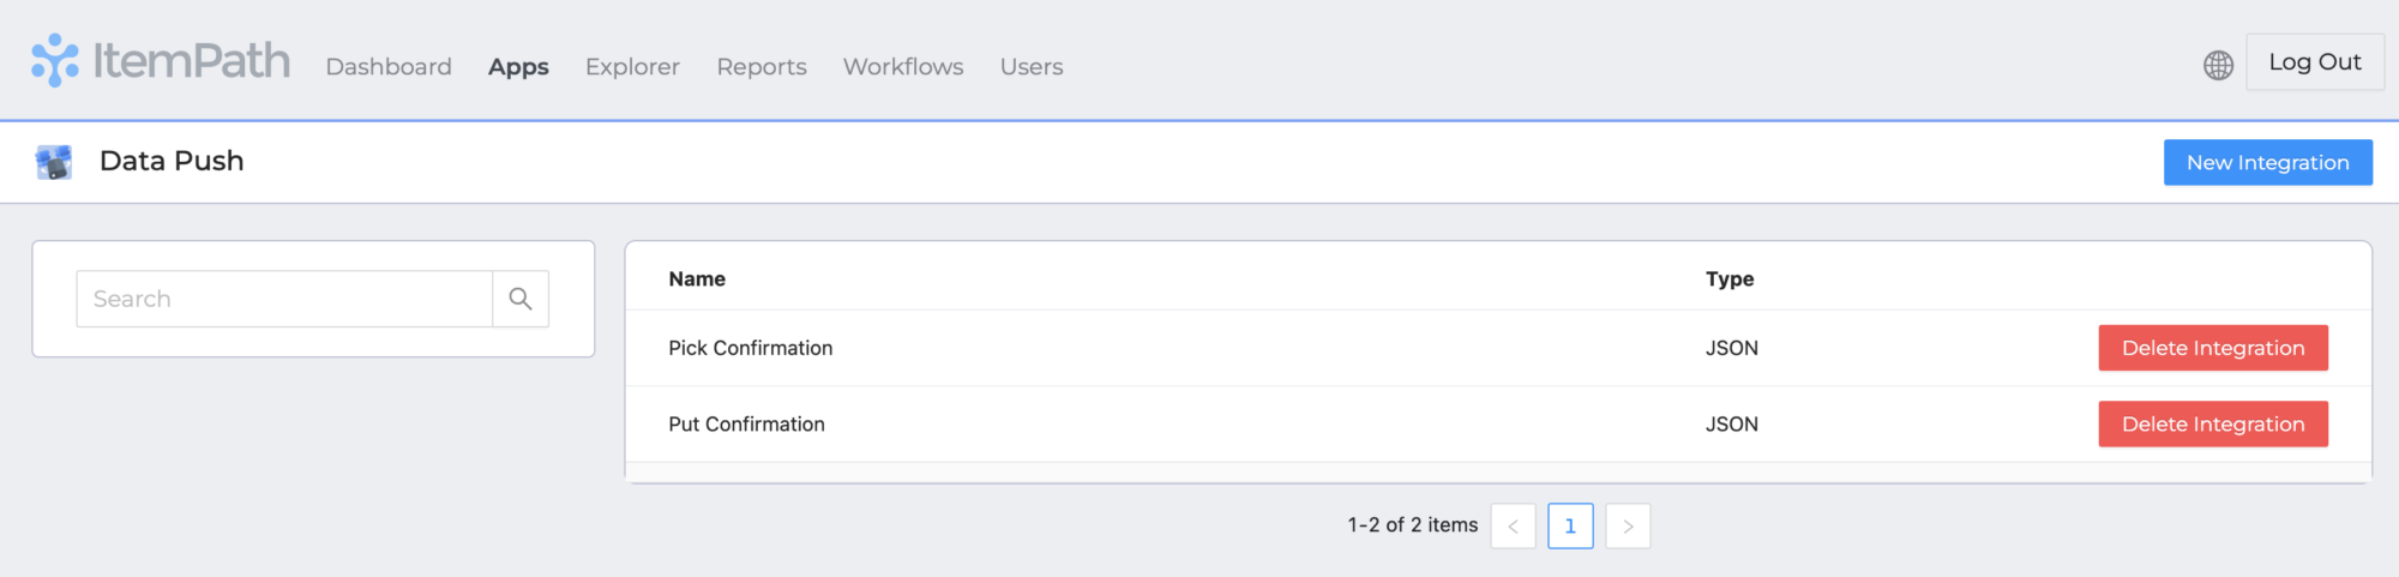
Give the integration a name, ideally one that demonstrates what kind of data it will be used to send. Set the format to "JSON" and select the connection you set up in the first step.
Integration Settings
Once an integration is created, you can click on it to look at the details. In the Settings tab, you'll see these options:
- General: Change the integration name, format, or connection.
- Connection: This is the extension of the connection base.
- Headers: Add or remove headers that should be included, like authorization tokens.
- Filters: Filter by history and/or motive type(s). Leaving these blank will include all types. Consolidate all transactions for individual order lines.
You can toggle the entire integration to "Inactive" with the switch at the top-right.

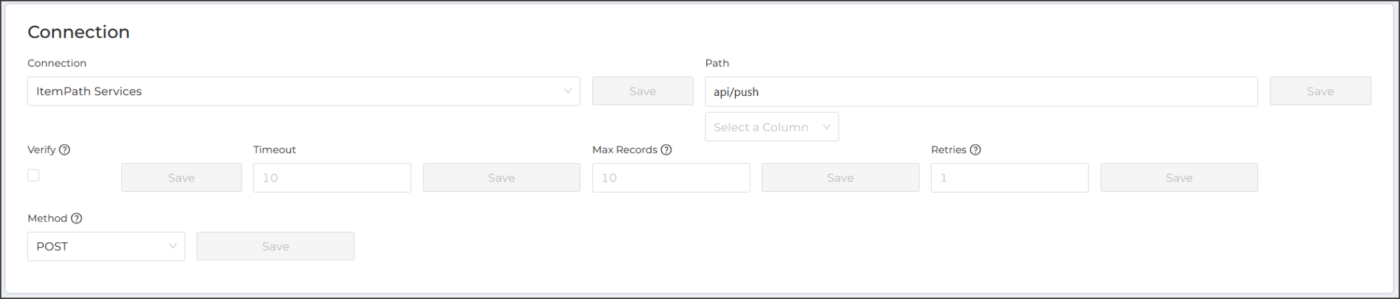
Connection
The Path entered here is the endpoint these transactions are being sent to. The path is an extension of the Data Push connection set up in ItemPath's global settings.
Checking Verify will require SSL certificate verification for this endpoint.
Timeout is the number of seconds that can pass without a response before Data Push logs a timeout error. The default is 10 seconds, and the maximum is 90 seconds.
Max Records is the highest number of transactions that can be processed in one second, for high volumes of records. The default is no limit, and the maximum is 100 records.
Retries indicates to Data Push how many times a transaction should automatically be resent if it fails to export, before being marked with an export error and moved to the Failed Attempts tab. The default is 1 retry, and the maximum is 5 retries.
Method is the HTTP method used for making the call.
Make sure to save each change as you update these details.
Headers
The headers entered here will apply to each transaction sent with this integration. These are also in addition to any global headers set up in the Data Push connection.
Check the "Private" box if these headers are used for authentication and should not be shown in the logs.

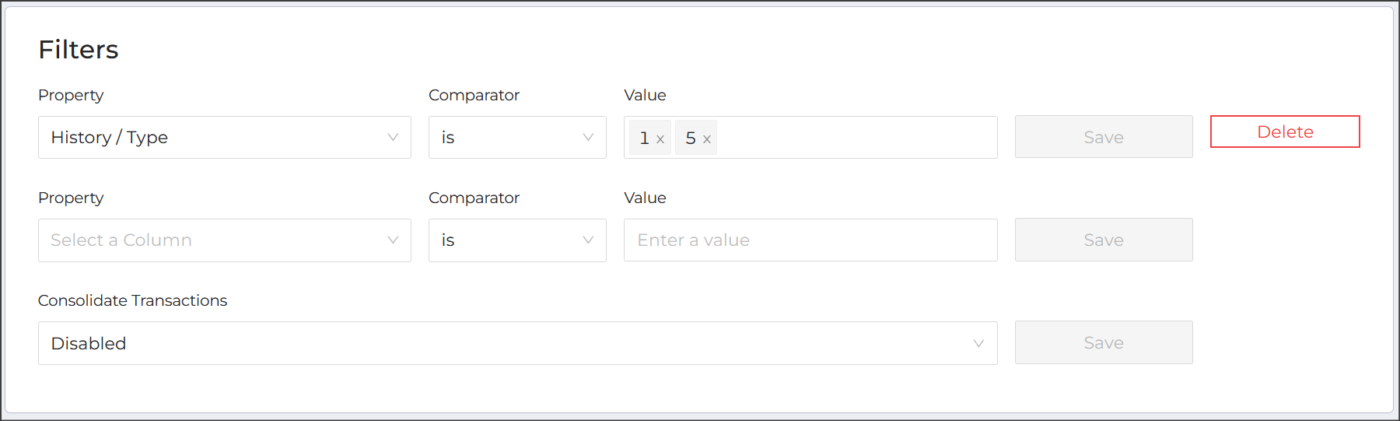
Filters
One of the benefits of having multiple integrations is having unique mappings for different types of transactions. These filters are where you select which transactions should be sent by this integration.
Leaving filters blank will mean that transactions of all types are to be passed by this integration.
You can filter by any column from your transaction data.
To add a new filter:
- Select the Property you would like to filter on (e.g., History > Type).
- Select the comparison operator (comparator) to use for the filter. (e.g., "is").
- Specify the values for your filter condition (e.g., "1", "3"). If you enter multiple values, ItemPath with use "OR" logic to assess the criteria. (e.g., "Type is '1', '3'" will be treated as "The type is either 1 or 3".
- Save.
After saving, a delete button will appear beside your saved filter, and a new row will appear so that you can enter any additional filters. If you save multiple filters, they will apply using "AND" logic (transactions must meet all saved filters to be sent with the integration).
Note: Be careful when using multiple filter criteria or filtering on multiple values. It can be helpful to have a sample transaction in mind that should be sent as part of the integration, and you can use that to validate that it will pass each criterion.
There are two common fields to filter on:
- History Type: History types describe the kind of transaction, sometimes indication what kind of order this transaction is from or if this was another operation (such as a correction/adjustment or cancellation). It is common to have unique integrations for Put transactions (type 1 and 3), Pick transactions (type 2 and 4), and Count transactions (type 6).
- Motive Type: The motive of a transaction indicates a reason why order processing wasn't fully completed by the transaction. For example, when an order line isn't fully picked, an option is given to set a "Shortage" motive type if there wasn't enough stock. A common use of Motive type filtering is to exclude motive types 5 (Deleted) or 6 (Canceled).
Consolidate Lines
This option allows you to determine how Data Push will consolidate transactions:
- When disabled, Data Push will send data for each transaction completed.
- When set to Consolidate Lines, Data Push will send transactions for each order line completed.
- When set to Consolidate Orders, Data Push will send transactions for each order completed.