- Docs
- Settings Overview

-
Installation
-
Updating
-
Settings
-
Logs
-
API
-
Reports
-
Snapshots
-
Workflows
-
Dashboard
-
Explorer
-
Users
-
Resources
-
Custom Fields
-
Cycle Counts
-
Data Pull
-
Data Push
-
Displays
-
Lights (Philips Hue)
-
Order Builder
-
Order Processor
-
Variance
Settings Overview
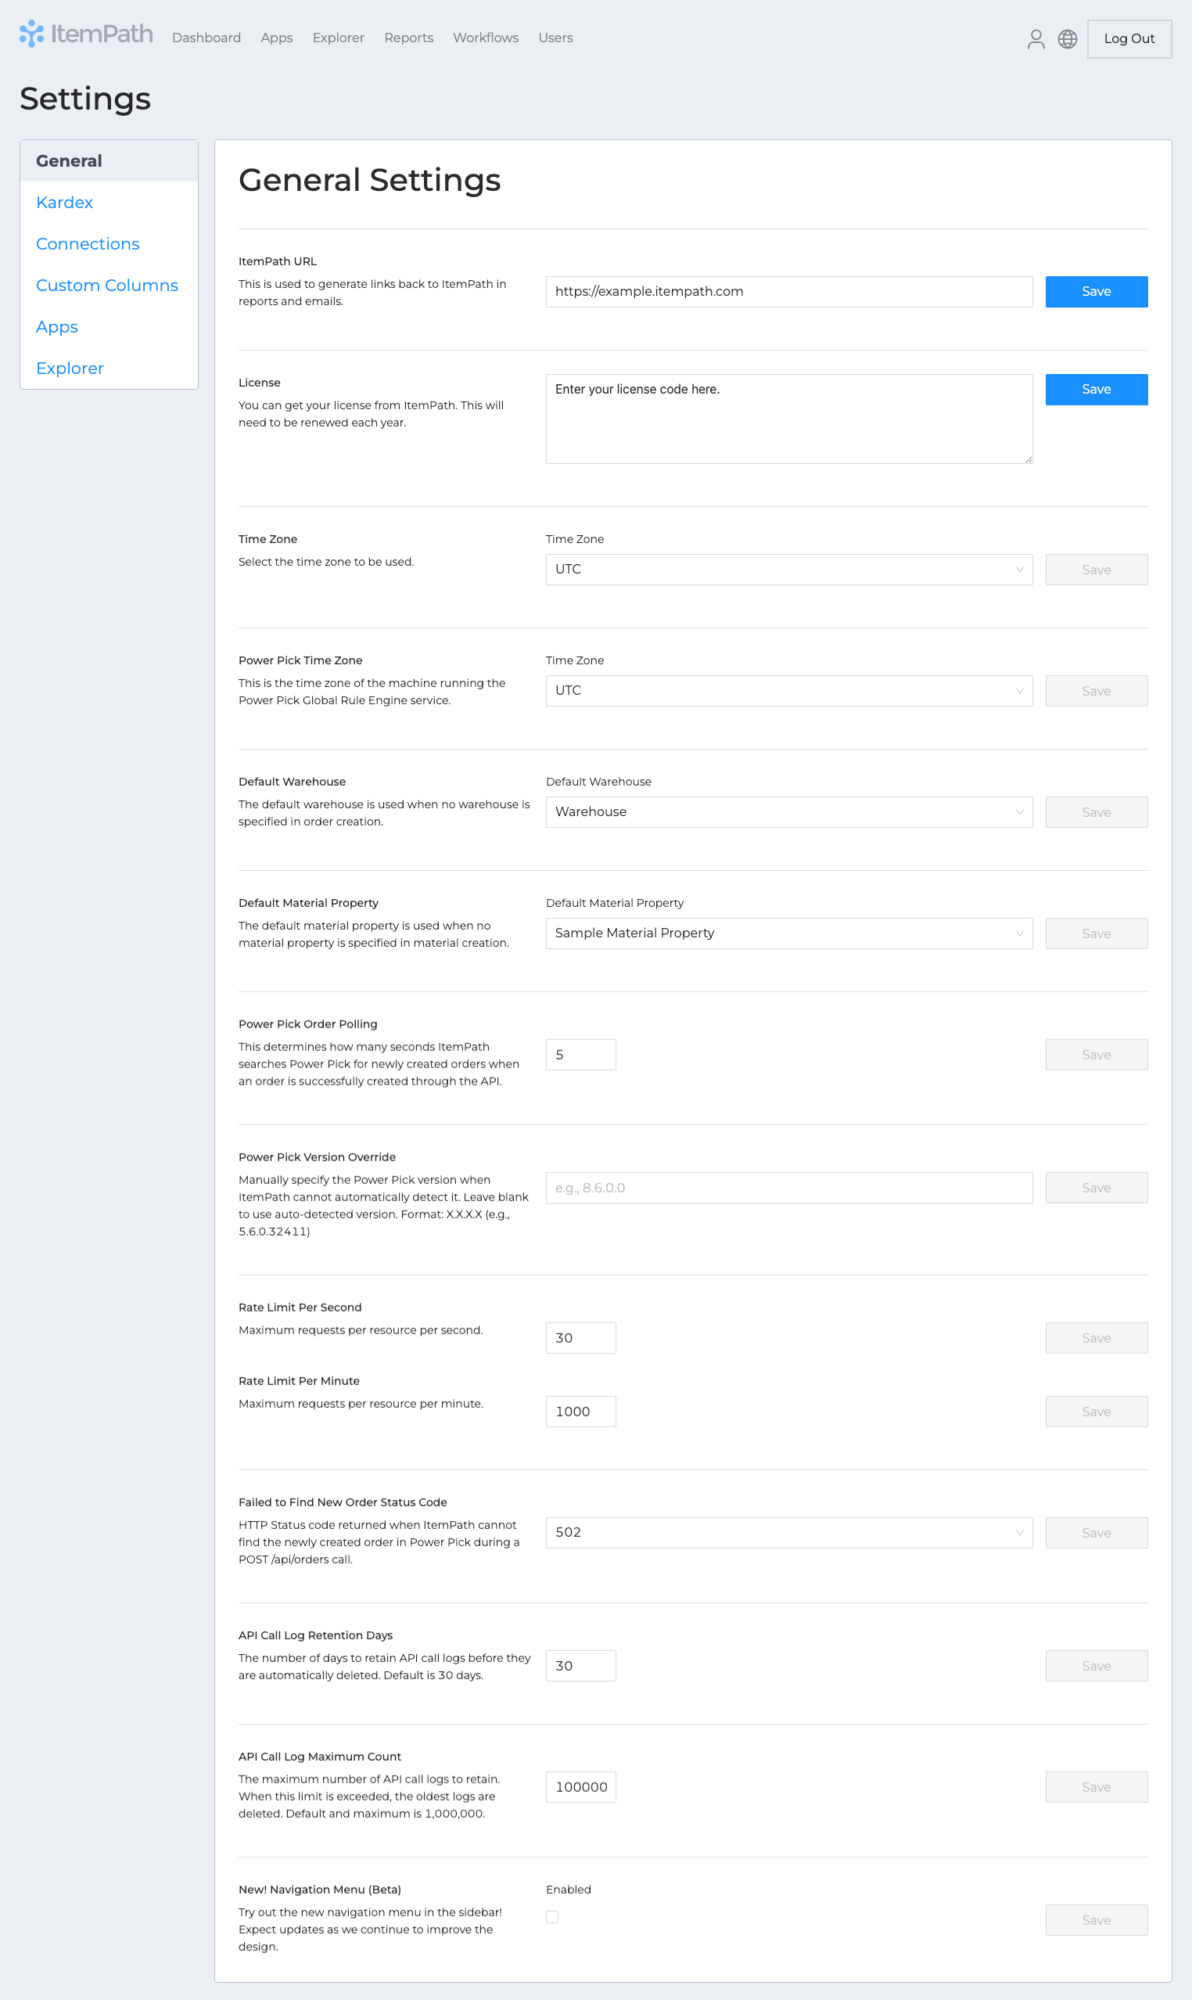
You can access your settings from the footer of your ItemPath site, or via http://[your URL or IP]/settings. Make sure to Save in order to apply changes to these settings.

General
This tab contains some behind-the-scenes configurations.

Setting | Definition | Additional Details |
| ItemPath URL | This is used to generate links back to ItemPath in reports and emails. | This link should be the URL of your ItemPath site, so that reports or emails generated by ItemPath (for example, a password reset email) direct users/recipients back to your site. |
| License | You can get your license from ItemPath. This will need to be renewed each year. | The ItemPath team will typically enter your encrypted license code for you, and update it when your subscription is renewed. If you prefer to enter your license yourself, you can get your license from ItemPath support and enter it here. (Note: When setting up the very first ItemPath user in an installation, there is a field to enter the license at that time, but it's not required.) |
| Time Zone | Select the time zone to be used. | This time zone will be the default for all new users. If no time zone is set, the default time zone is UTC. Users can also set their personal time zone in their user settings. |
| Power Pick Time Zone | This is the time zone of the machine running the Power Pick Global Rule Engine service. | This time zone is used to convert datetime values to the user's time zone. It's also used for applying accurate report filters on datetimes. |
| Default Warehouse | The default warehouse is used when no warehouse is specified in order creation. | Use this dropdown to select the warehouse used by default when creating orders with the API. If another warehouse name is entered in the API call, the call will override the default. This setting applies to API calls made by all users or applications. |
| Default Material Property | The default material property is used when no material property is specified in material creation. | Use this dropdown to select the material property used by default when creating materials with the ItemPath API. If another material property is set in the API call or Data Pull integration, that will override this default. This setting applies to API calls made by all users or applications. (Note: This should likely match the default material property in Power Pick, such as "BASIC".) |
| Power Pick Order Polling | This determines how many seconds ItemPath searches Power Pick for newly created orders when an order is successfully created through the API. | The number of times ItemPath will attempt to find a newly created order in the database; useful if Power Pick takes time to process web service requests.This works hand-in-hand with the Failed to Find New Order Status Code setting. |
| Power Pick Version Override | Manually specify the Power Pick version when ItemPath cannot automatically detect it. Leave blank to use auto-detected version. Format: X.X.X.X (e.g., 5.6.0.32411) | Manually sets the version to ensure compatibility before the initial database connection is established or when auto-detection is unavailable. |
Rate Limit Per Second Rate Limit Per Minute | Maximum requests per resource per second. Maximum requests per resource per minute. | Limits the number of API requests allowed per second/minute to prevent unintentional resource overuse and ensure compatibility with the rate limits of integrated API providers. |
| Failed to Find New Order Status Code | HTTP Status code returned when ItemPath cannot find the newly created order in Power Pick during a POST /api/orders call. | Works hand-in-hand with the Power Pick Order Polling setting. Select either 200 or 502 as the code to return when an order is created but cannot be retrieved from the database after all polling attempts. |
| API Call Log Retention Days | The number of days to retain API call logs before they are automatically deleted. Default is 30 days. | You can access Logs from the footer of your ItemPath site, or via http://[your URL or IP]/logs. You can also create reports using the Log theme to filter and search for specific records. |
| API Call Log Maximum Count | The maximum number of API call logs to retain. When this limit is exceeded, the oldest logs are deleted. Default and maximum is 1,000,000. | Limits the total number of records stored in the API log. Reducing this value improves system performance and increases querying speed when viewing logs. |
| New! Navigation Menu (Beta) | Try out the new navigation menu in the sidebar! Expect updates as we continue to improve the design. | Enabling this setting will only affect the logged-in user, giving each user the choice between the classic top navigation, or new sidebar. |
Kardex
Here is where you enter details to connect to your Power Pick database and Web Services module, if using. A successful connection is indicated by a green check mark next to the "Test Connection" button. Check out this guide on connecting to Power Pick.
It is important to leave these settings untouched unless something in your Power Pick configuration has changed, such as IP address or user details.

Connections
This tab manages connections other than Power Pick, such as ERP systems and Philips Hue bridges, used by ItemPath apps. Documentation on setting up connections for these apps are listed below:
- Data Push connection (or follow the Data Push course)
- Lights connection

