- Docs
- Data Pull Overview
- Integration Settings
-
Installation

-
Updating
-
Settings
-
Logs
-
API
-
Reports
-
Snapshots
-
Workflows
-
Dashboard
-
Explorer
-
Users
-
Resources
-
Custom Fields
-
Cycle Counts
-
Data Pull
-
Data Push
-
Displays
-
Lights (Philips Hue)
-
Order Builder
-
Order Processor
-
Variance
Integration Settings
What is an integration?
Data Pull integrations allow ItemPath to "reach out" to a connect service (like an ERP or WMS) to retrieve Order and Material data automatically or manually.
An integration contains the necessary information to retrieve the data, any settings that override your global Data Pull or Connections settings, and a user-friendly interface to map the data to Power Pick.
Once activated, Data Pull integrations will poll your connection at regular intervals. If Data Pull finds new data, it then create or deletes data in Power Picking using that new information.
Create an Integration
Navigate to the Data Pull app and create a new integration from scratch, or import a template from another environment.
Import an Existing Template: If you have a template file exported from another environment (e.g., your test environment), you can click the Import button to upload your template. This will automatically populate the settings and mappings you've already configured.
Create a New Integration: To create a new integration from scratch, click New Integration and follow these steps:
- Name: Give the integration a unique and descriptive name.
- Connection: Select the pre-configured connection you want to use. For detailed instructions see Connection Settings.
- Type: Select either "Order" or "Material".
- Method: If you selected "Order", you can set the Method to either "Creation" or "Deletion". If you select "Material", the Method will default to "Creation".
- Create: Click Create Integration to continue configuring the integration settings.

Integration Settings
The Settings tab is divided into four sections to manage how ItemPath communicates with your external system.
General
- Integration Name & Structure: Update the name or the data structure if needed.
- Activation Toggle: Set the integration to Active to allow for automated polling.
- Download as Template: Use this to export your configuration from one environment to import into another (e.g., From your test environment to production).

Connection
- Path: Define the specific endpoint and any relevant filters. The path is an extension of the Data Pull connection set up in ItemPath's global settings. Note: This is not the full URL for the connection as that is already configured in the global connection settings.
- Add Date Filter: Use this component to add formatted date ranges (e.g., Last 1 Day) into the path string.
- Timeout: Set the maximum wait time for a response (Default: 10s).
- Verify: Enable if SSL certificate verification is required for this endpoint.

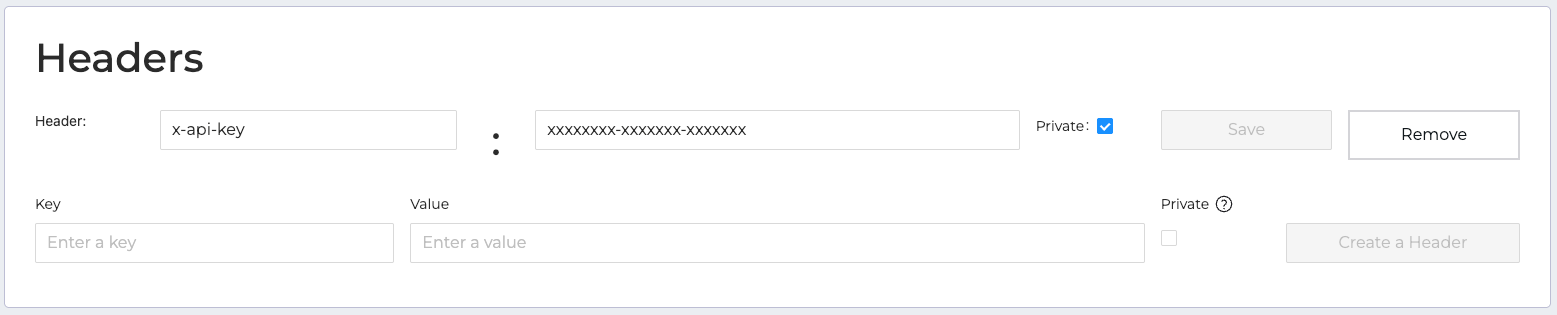
Headers
Manage authentication or custom metadata by adding dynamic Headers. The headers entered here will apply to each transaction sent with this integration. These are also in addition to any global headers set up in the Data Pull connection.
- Private: Select if the headers are used for authentication and should not be shown in the logs.
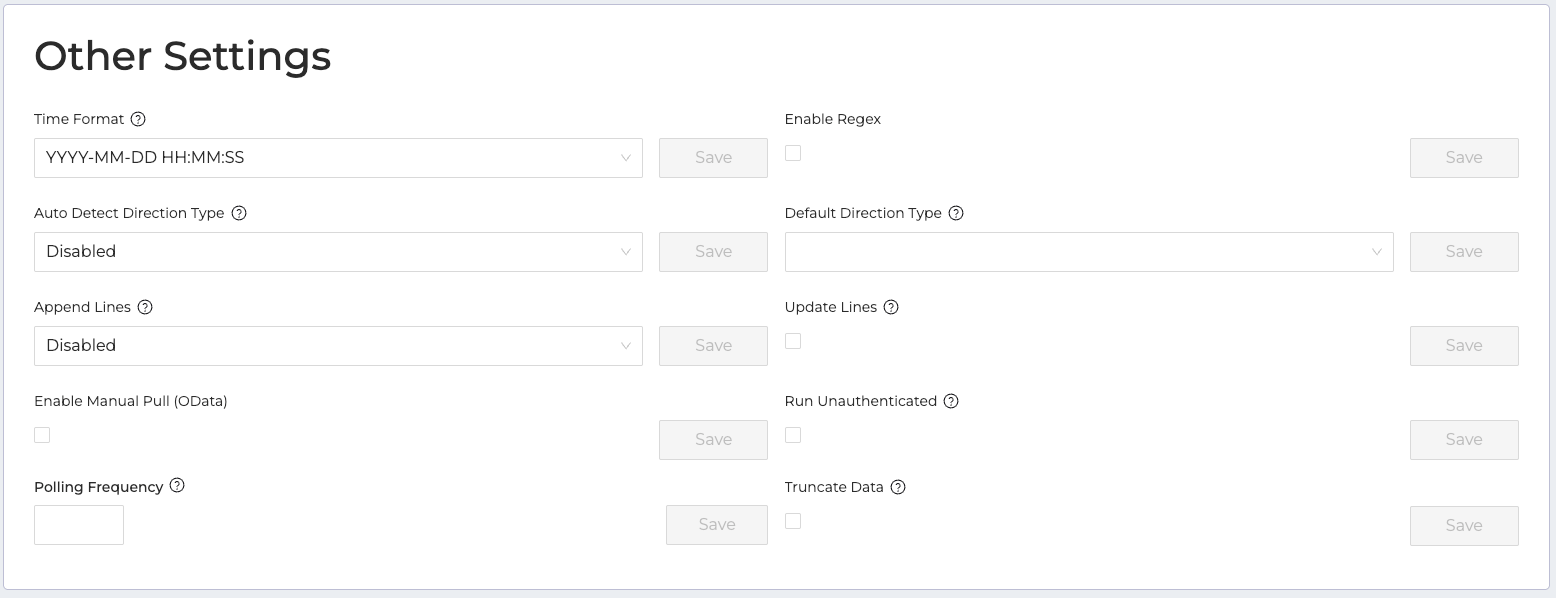
Other Settings
Some settings in this section will vary, based on the Type: Order or Material, and the Method: Creation or Deletion.
The following settings are available for Creating Orders or Materials.
Always Available:
- Time Format: Select the time format of the incoming datetime values. The default datetime format is %m/%d/%Y.
- Enable Manual Pull (OData): When selected, the Manual tab becomes available. See Manual Pull (OData) for more information.
- Polling Frequency: Set a custom frequency for this integration if you would like to override the global polling frequency.
- Enable Regex: When selected, advanced mappings may be used to transform incoming data (e.g., Extracting a value from the middle of a string).
- Run Unauthenticated: When selected, making requests through the integration's Run endpoint does not require JWT authentication. (See Manual Runs)
- Truncate Data: When selected any strings that are longer than the allowed length for that field will be truncated, preventing the Order from failing validation checks.
Orders Only:
- Auto Detect Direction Type: Select if negative values should be automatically treated as Picks or Puts. This setting will override the Default Direction Type.
- Append Lines: If enabled, new Order Lines for an existing Order will be appended to that Order. If disabled, a new Order will be created.
- Default Direction Type: Select Pick, Put, or Count. If not set, the default direction type is Pick.
- Update Lines: If enabled, existing Order Lines can be updated when included with a new task. If disabled, existing Order Lines will be ignored.
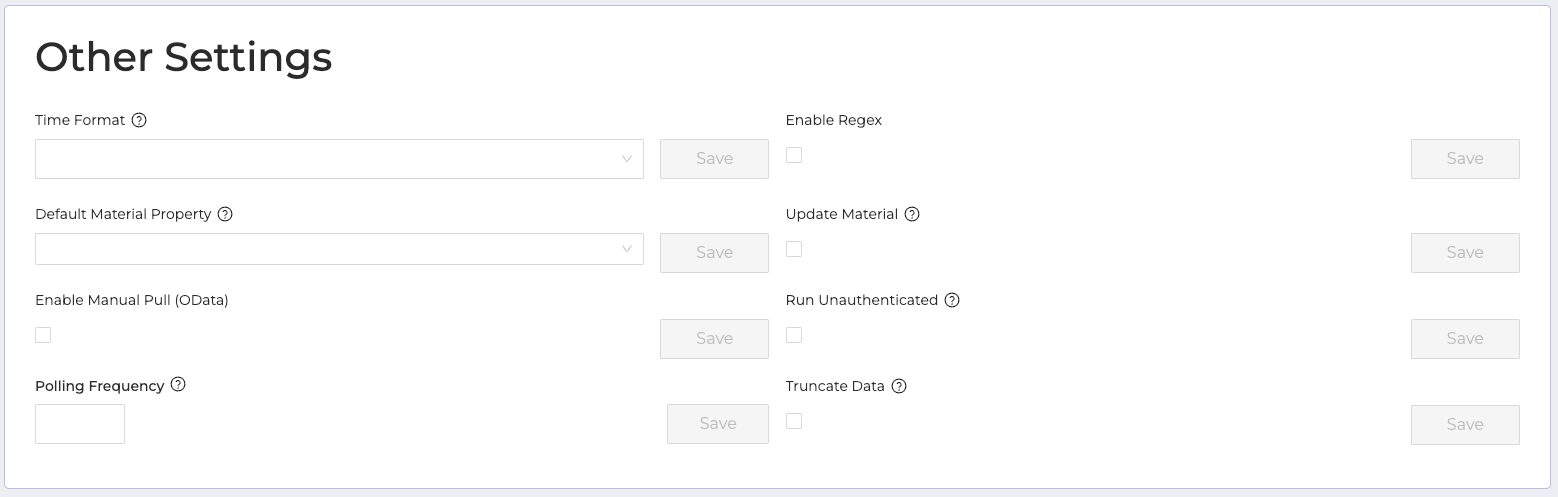
Materials Only:
- Default Material Property: Select a default Material Property to use when one is not specified during Material creation.
- Update Material: If enabled, existing Materials can be updated. If disabled, existing Materials will be ignored.
For information on settings for Deleting Orders or Materials, see Deleting Orders with Data Pull.****
Note: You can configure the global (default) polling rate for Data Pull through Settings > Apps > Data Pull. The minimum polling frequency is 5s, the maximum is 86400s (24 hours).
Managing Data
Once your settings are configured, use these other tabs to map your data and monitor performance:
Tab | Description | Reference Guide |
| Tasks | Monitor success and errors and re-queue failed tasks. | Integration Tasks & Tests |
| Mappings | Map external fields to Power Pick. | Mappings and Confirmations for Data Pull |
| Test | Data your settings and mappings without sending records to Power Pick. | Integration Tasks & Tests |
| Confirmations | Configure automated responses back to the source system. | Mappings and Confirmations for Data Pull |
| Manual | Perform manual OData pulls (tab visible only if enabled in Settings). | Manual Pull (OData) |
| Run | Manually trigger a a Data Pull integration. | Manual Runs |
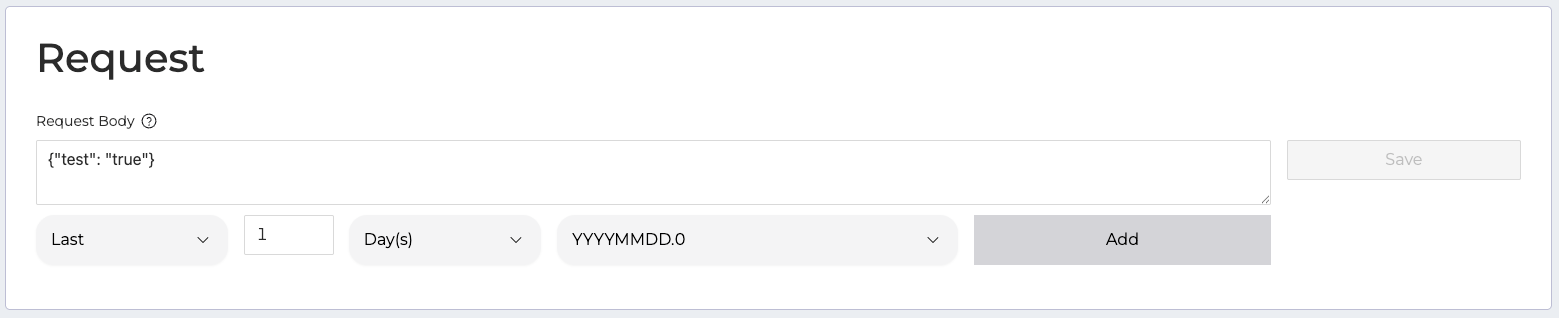
Request
For integrations using HMAC authentication connections, the Request card lets you specify the request body for POST requests. This should be standard JSON. The interface lets you specify a dynamic date and time parameter for the requests.