Create a New Workflow
Workflows automate your warehouse by connecting your data with specific actions. Before creating a workflow, make sure you have a Report ready that identifies the exact data you want to act on.
Many automated workflows are designed to look for a row count Greater Than 0. Ensure your source report is filtered to only show items that require an action (e.g., a report filtered for Materials with < 10 units in stock). If the report is populated with at least 1 row, the workflow will trigger the specified actions.
Setting Up a New Workflow
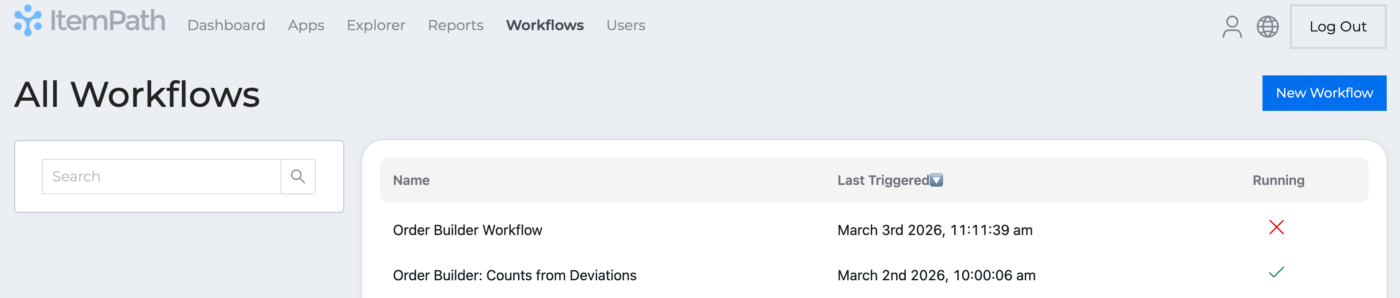
- Navigate to the Workflows tab and click New Workflow.
- Enter a descriptive Workflow Name and click Create Workflow.
Once created, you'll be redirected to the workflow configuration page.
Note: If you do not have the ability to create a new workflow, your user role might not have that permission enabled.
Setting Up a Trigger
Triggers determine exactly when and how often ItemPath checks your data to see if the workflow's conditions are met and if its actions should run.
To configure your trigger, simply specify a frequency and interval for your Workflow. This is incredibly flexible to meet the various needs of your business. You could set a Workflow to run every day at 6:00am, once a year, or every 2 minutes if you wanted.

Depending on the frequency you select, you'll need to provide additional timing details:
Hours: Specify the minute within the hour (e.g., Every hour at 15 minutes past).

Days: Specify the exact time of day.

Week: Specify the day(s) of the week and the exact time of day.

Month: Specify the day of the month and the exact time of day.

Year: Specify the month, the day of the month, and the exact time of day.

Defining Criteria
Once the timing is set, you can define the Criteria. The workflow will only run if the data found matches these specific rules.
- Select Report: Choose the report that identifies that identifies the exact data you want to act on.
- Define Row Count: Set a comparison for the row count. For example, if you set the criteria to Greater Than 0, the workflow will only proceed if there is actually data to process.
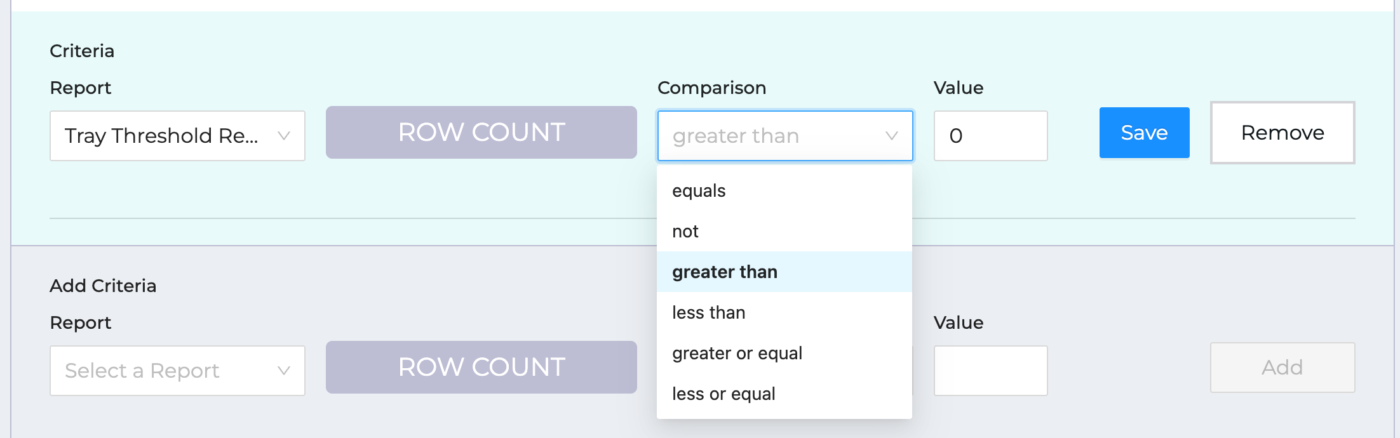
Tip: You can create a Workflow without any criteria and it will always run based on the frequency of the trigger. Be cautious with using this option as you don't want to accidentally create unnecessary orders or flood inboxes with automated emails.
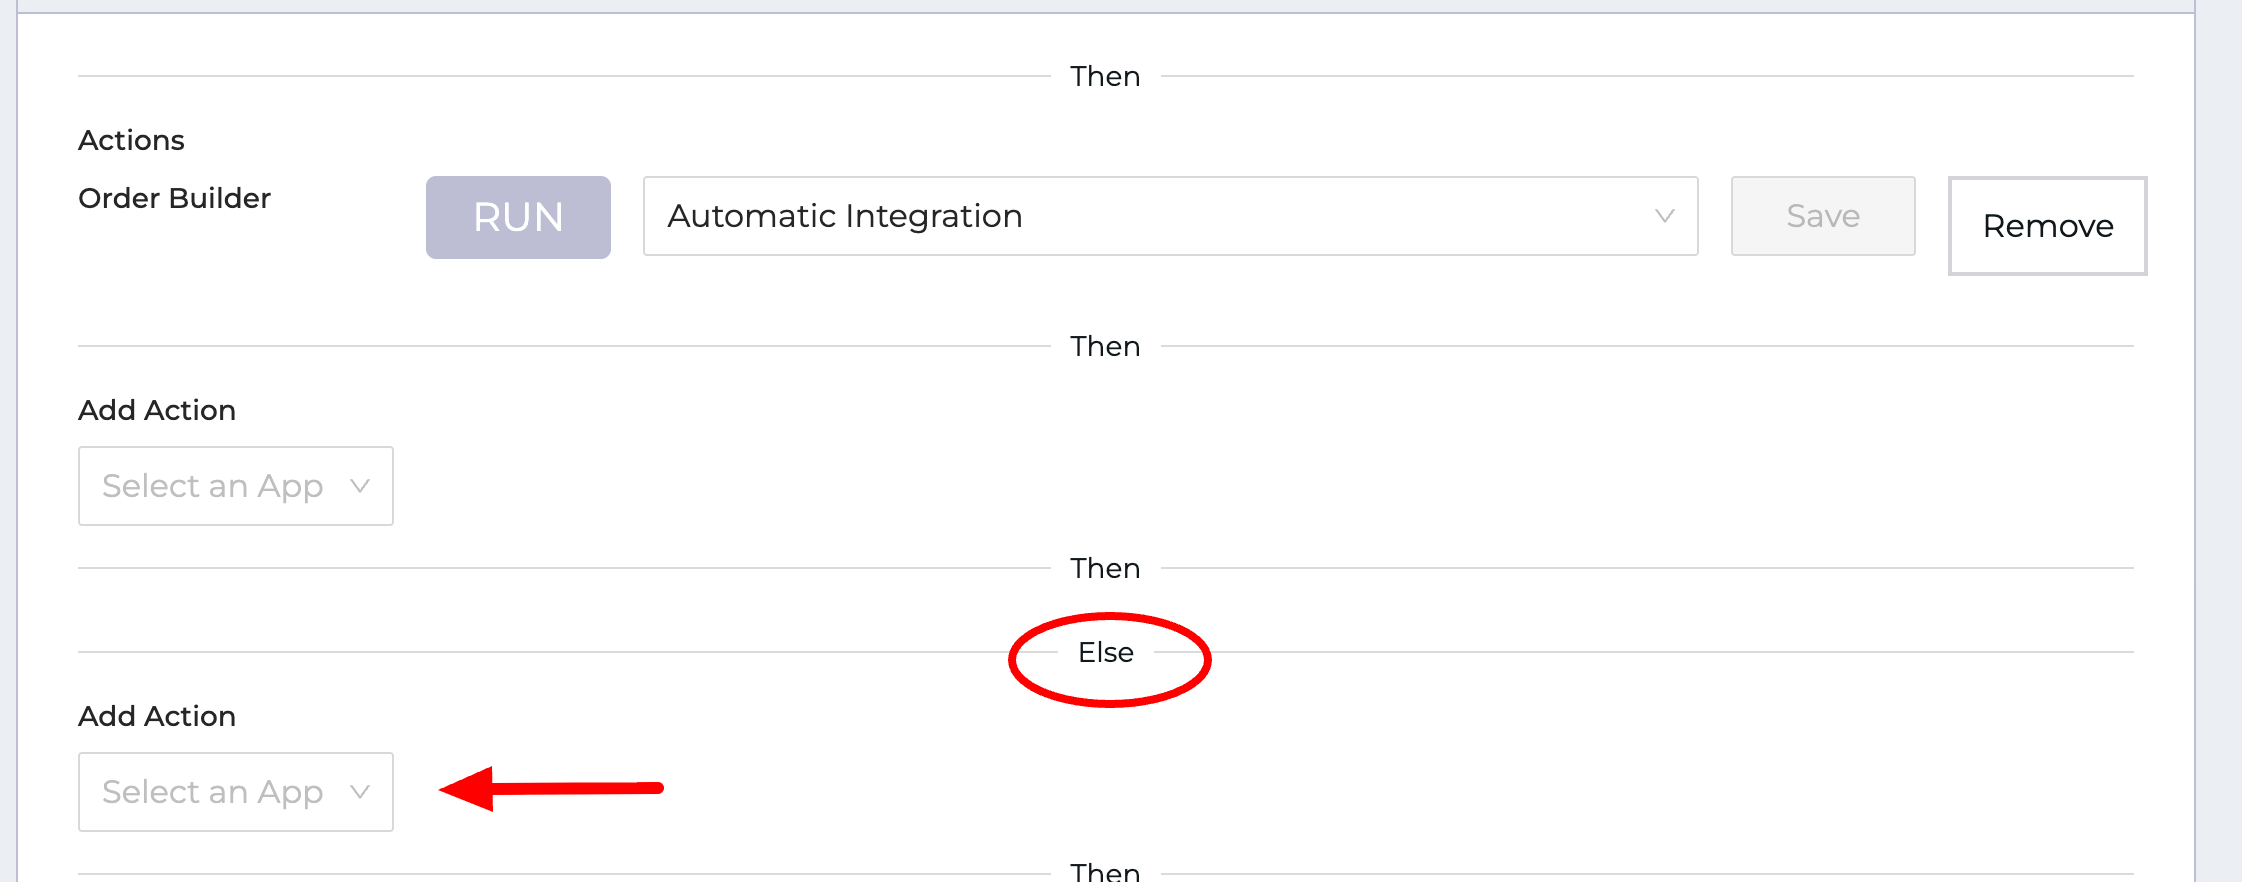
Actions
When the trigger fires and the criteria are met, the workflow will perform its assigned actions. There are six action types available:
| Action | Definition | Notes |
|---|---|---|
| SMS | Send a message via SMS to the phone number provided in the action. | Only one phone number per action. |
| Lights | Triggers a change in a Phillips Hue light’s color (requires selecting a bridge and a zone). | Requires the Lights app |
| Order Builder | Creates orders using data from the report and mappings specified in an Order Builder integration. You must select an automatic Order Builder integration. | Requires the Order Builder app |
| Sends an email with a plain-text body to the recipient email addresses provided in the action. Can include report data in either XLSX or CSV format. | Can include multiple emails addresses. | |
| Data Push | Triggers a specific Data Push integration. | Requires the Data Push app |
| Data Pull | Triggers a specific Data Pull integration. | Requires the Data Pull app |
- Select an App. Depending on the app or method of communication, you'll need to fill out a few more details, like the email address and the message content, or the name of the integration you want to run.
- Click Add Action.
You can add multiple actions to one Workflow.
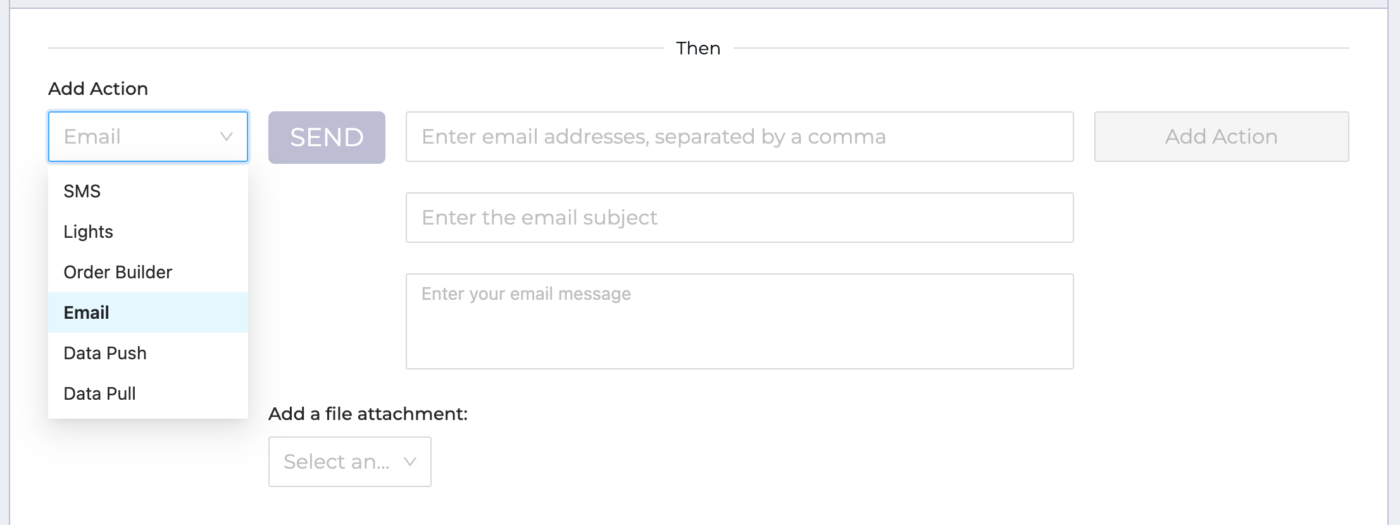
You can also set an "Else" action, which will happen if the criteria is NOT met when the workflow is run. The action options will be the same; you can use the same app as before, or choose something else.
Tip: It is best to create a new workflow for each report/file type and app/communication grouping.
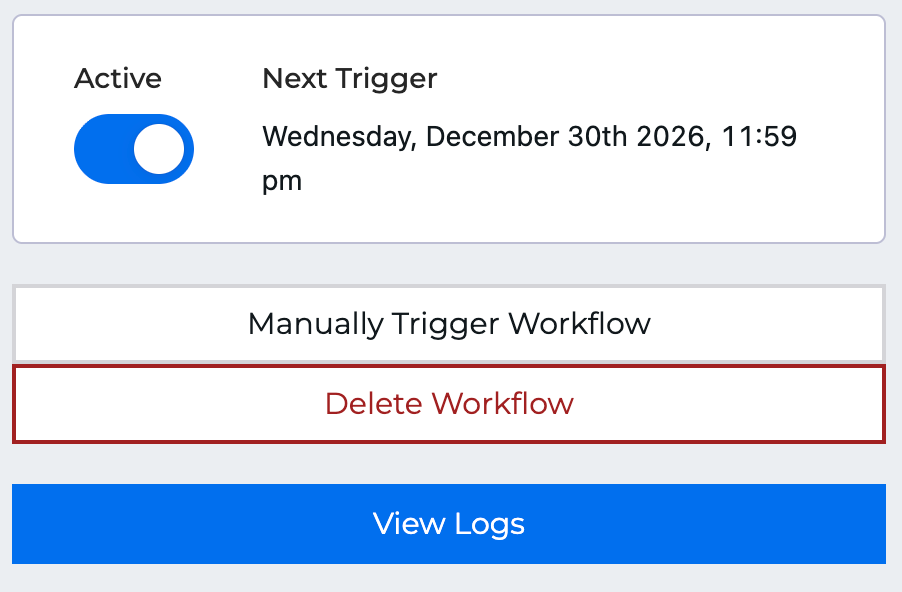
Manually Trigger Workflows
You can trigger a workflow manually, from the sidebar.
Note: This is not a test - this will run your workflow.
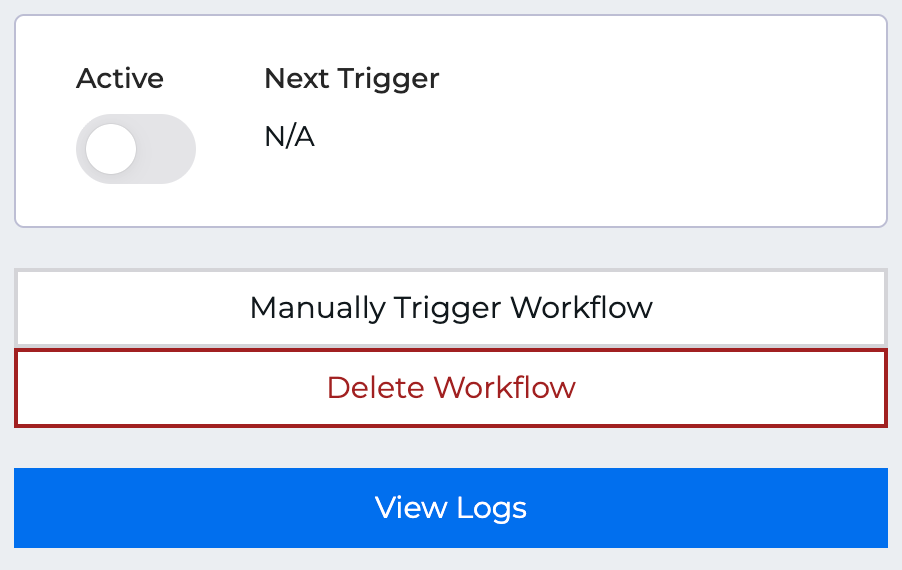
To see the outcome of running your workflow, whether triggered manually or automatically, you can view the workflow logs.
Activate Your Workflow
Turn your workflow on or off with the Active toggle in the sidebar, or delete it altogether if necessary.